

- DGK Viper 8.125 Deck Review: An Overall Good Board - April 20, 2022
- Best Skateboard Bearings Guide: All You Need Consider - January 27, 2022
- Most Famous Old School Skateboarders - January 27, 2022
If you are new to the world of skateboarding, the idea of building a board and doing any sort of board maintenance can be daunting. I remember being a young kid who took up skateboarding, and I would take my board to the local skate shop for just about anything. To grip the board, to rethread my trucks, whatever it was, I was too worried about messing things up to try it myself. However, putting together a board and doing regular maintenance is all part of the fun, and truthfully, it can be quite therapeutic. I would even go as far as to say that piecing together your new board is almost as fun as using it. It’s akin to a gamer having as much fun building their PC as they ultimately do use it.
We assume that a lot of beginner skaters will opt for complete set-ups from their local shop because it’s convenient and it negates any chance of slip-ups. However, if you do this, you don’t get the joy of choosing custom parts that suit your needs and your aesthetic. So we want to offer all you skaters out there an extensive guide, allowing you to build a custom skateboard you can be proud of. We aim to show you that it’s super easy, tonnes of fun, and allows you to add a few personal touches to your board. So without further delay, here is our how-to build a custom skateboard guide!
What is a DIY Board?


Now, before we have some people in the comments hit me up; we are aware that this can be taken one of two ways. Some people will consider a DIY deck to be a deck that is completely made from scratch. This means the skater will need to do the gluing and pressing of the plywood; they will need to cut the board out of the woodblock, they will need to sand it, give it a design and then put the rest of the components on to complete the board. Well, that isn’t what we are referring to here. We are talking about a custom build that sees the skater purchase a pre-made board and select components that they want to add, creating a cohesive final product.
This is considered a custom deck as the skater still has to pick all the parts here, and they also have to put the board together. I just thought we would clear that up before we moved on.
What You Will Need
Before we get into the actual skateboard components that you will need, there are some tools and some essentials that you will need before you get to work building your board. So take a look below and mark these off like a checklist:
A Skate Tool & Allen Key
You’ll need to make sure that you have a skate tool with an Allen key before you go about putting this board together. We would suggest the following skate tool that we have right here.
Pig Skateboard Tool – Solid Black

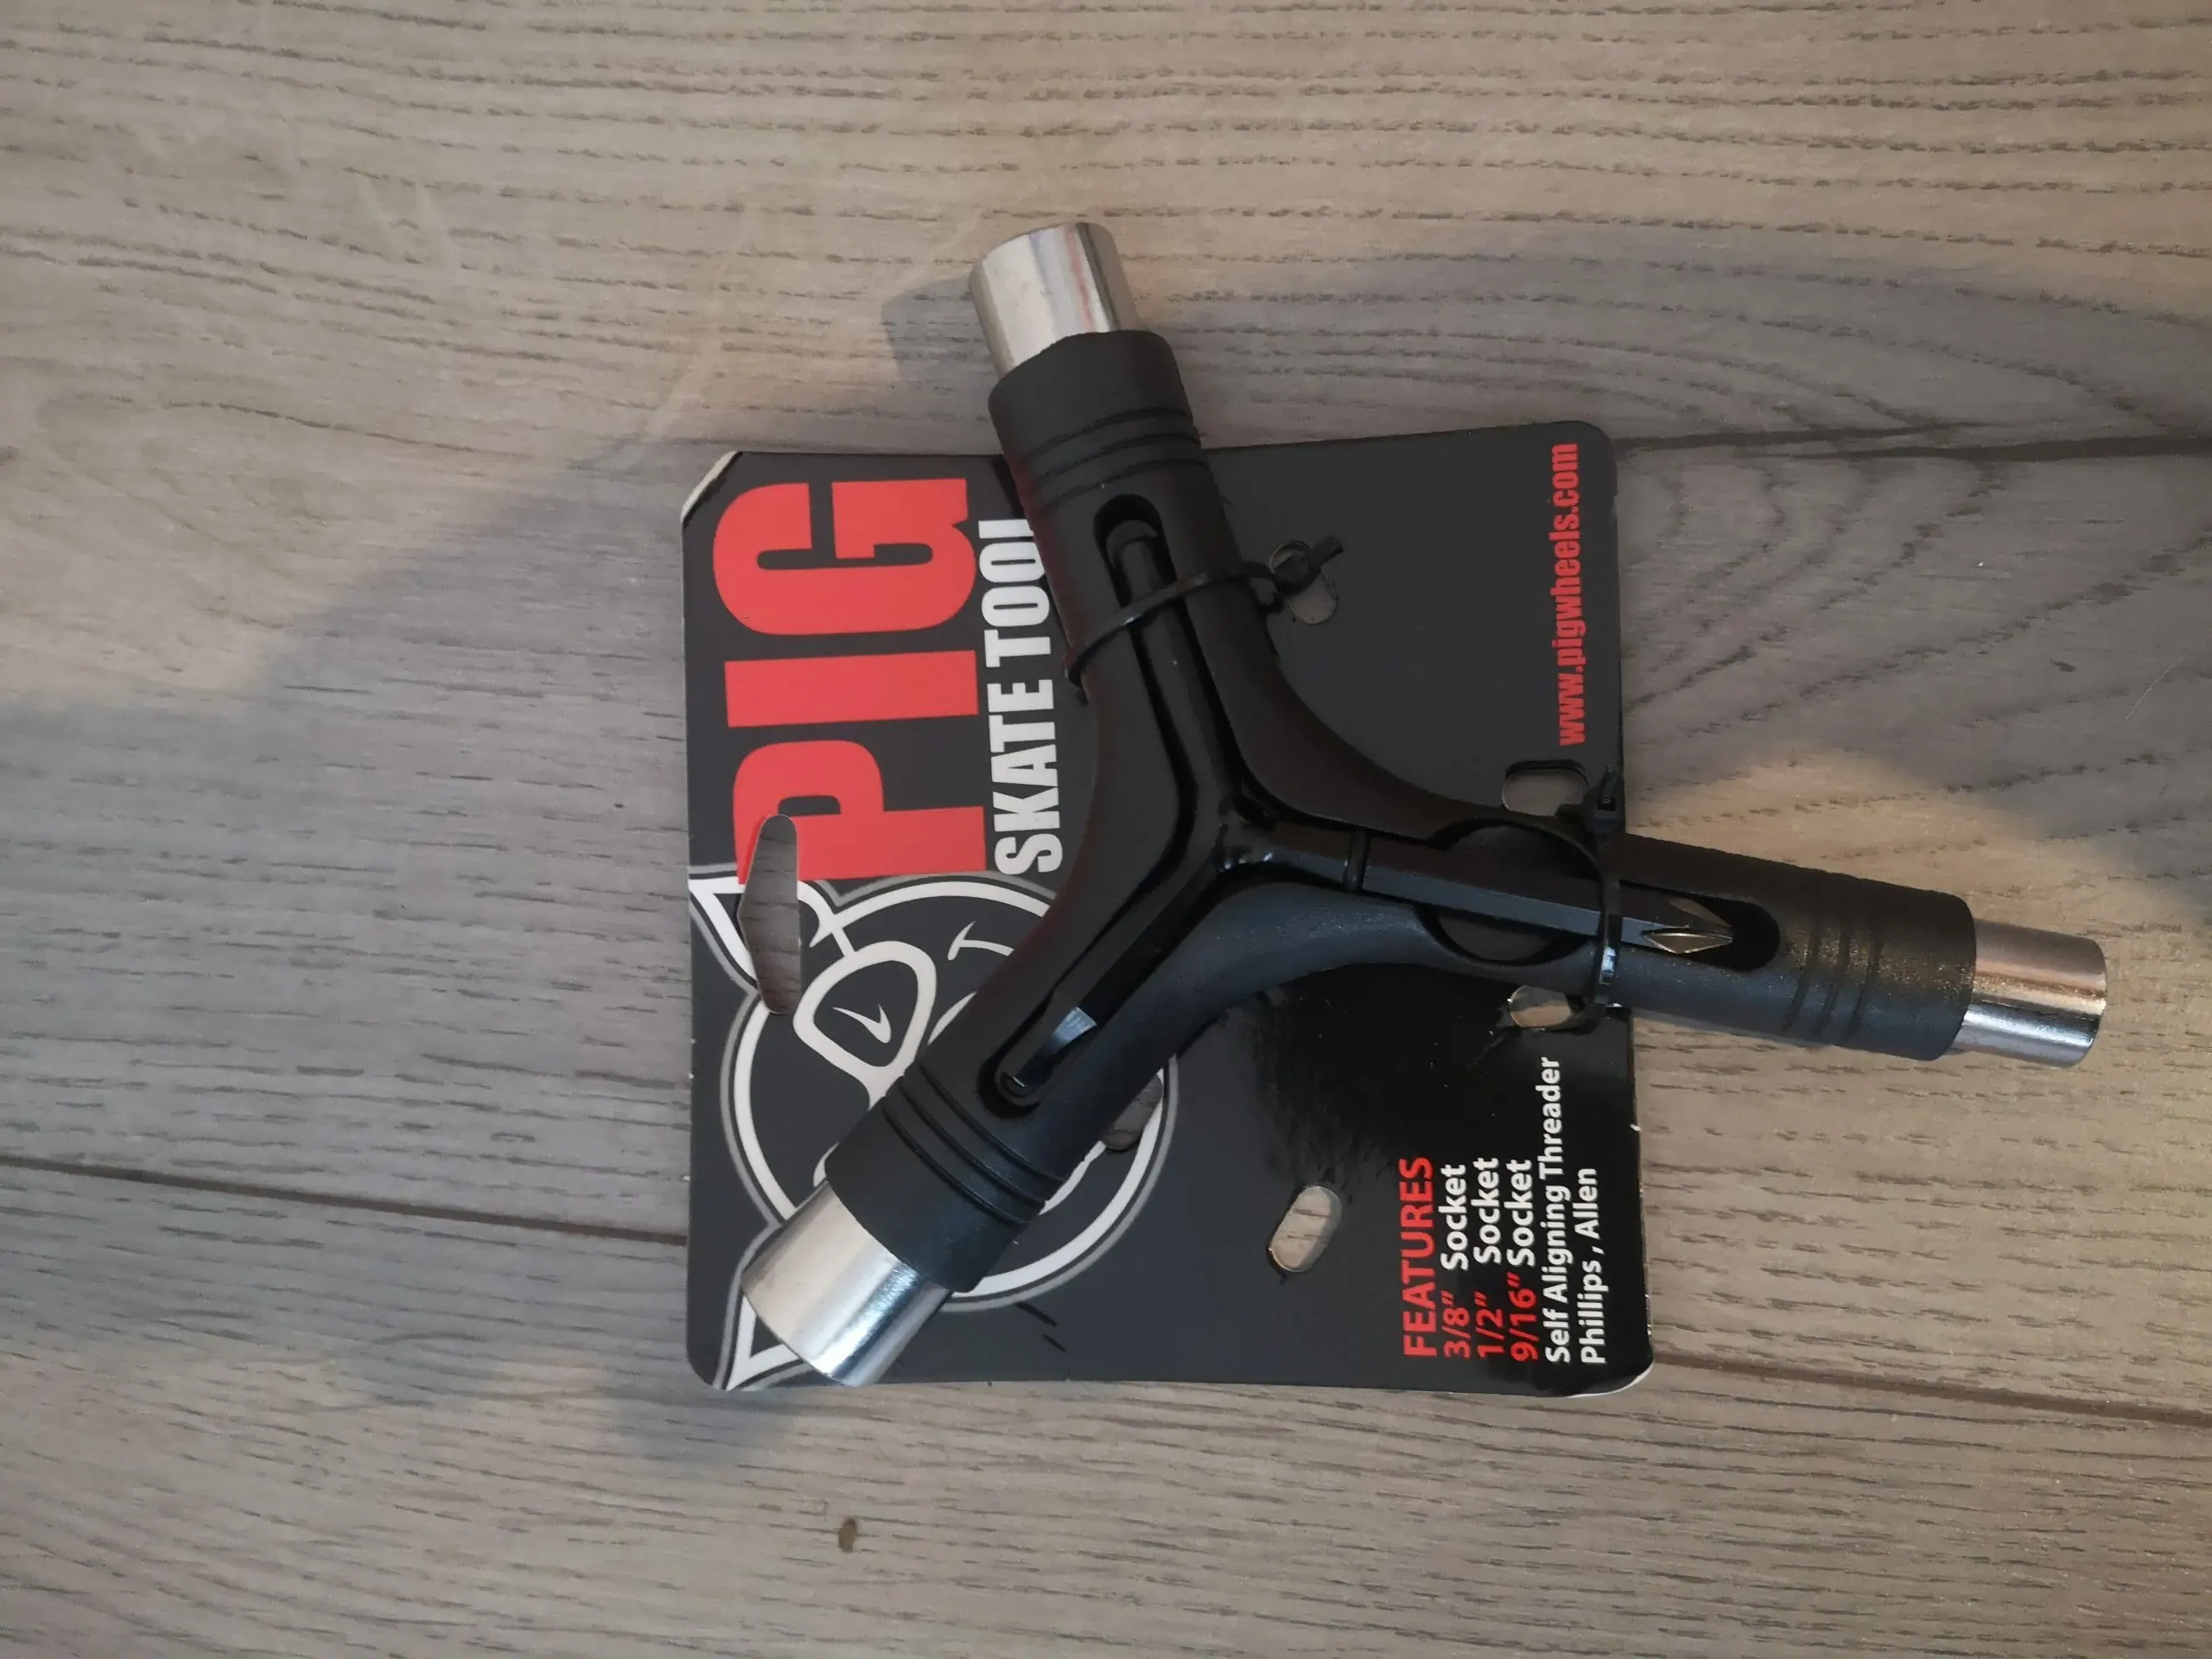
This skate tool does it all; it has all the fittings, including a rethreaded, it has a tight space to fit the accompanying Allen key, and it is a really well-constructed tool. Failing this, you can go for a cheaper model, or if you are someone that has a well-stocked toolbox, if you have 1/2 inch, 9/16 inch, and 5/8 inch spanners and a 1/8 inch Allen key, then this will work too. However, for convenience sake, we say invest in a skate tool.
Razor Blade/Stanley Knife
Next up, you’ll need to get your hands on a razor blade, a Stanley knife, or something along these lines that is sharp and easy to hold and maneuver when you cut your grip tape. I personally use a Stanley knife as it is great for cutting off those little left behind tags of grip tape to make everything look pristine. However, as long as it is sharp and cuts straight and true, then go with your preference.
A Flat Surface to Work on
While you can put together a board while out at the park, sitting on the floor if needs be, it’s not the ideal situation. Ideally, we would urge skaters to work at a table or desk that allows them to work on the board from a standing position.
Banging Tunes
Then lastly, while not a necessity, we would appeal to the punk in all of you readers and urge you to pop on some skate tunes to serve as your custom skateboard building soundtrack. Music is a subjective thing, but I’ll link my personal skate playlist if you want to borrow it to save yourself some time and effort.
Our Setup
Okay, so now that you have all the essential bits and bobs, it’s time to get into the components that you will need for your custom deck. For this article, we went out and put together our own setup and tried our best to get hold of some of the best gear on the market, and equally, components that are cohesive and look excellent when combined. We think we did an excellent job, but we will let you be the judge. This is what components that you will need for a custom skateboard and all the parts we went with:
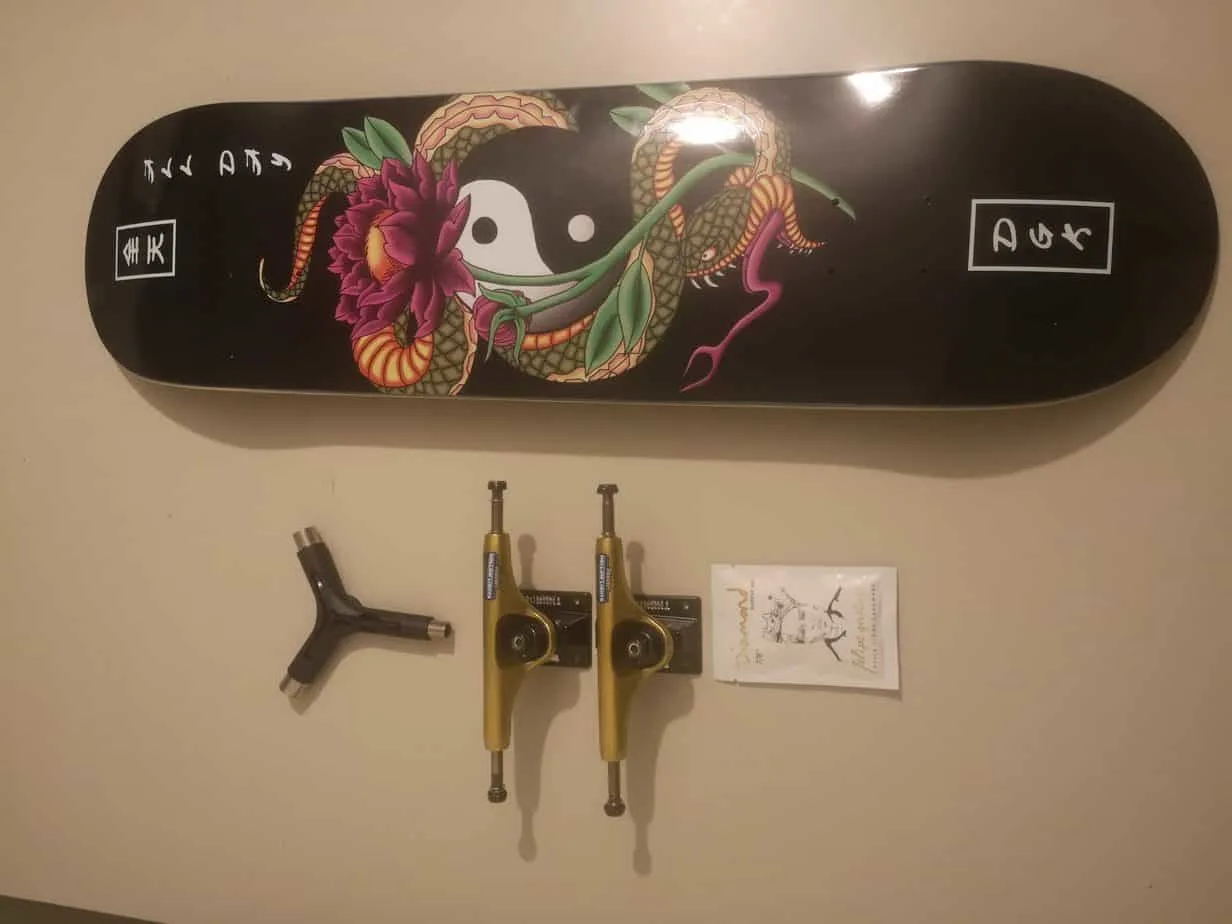
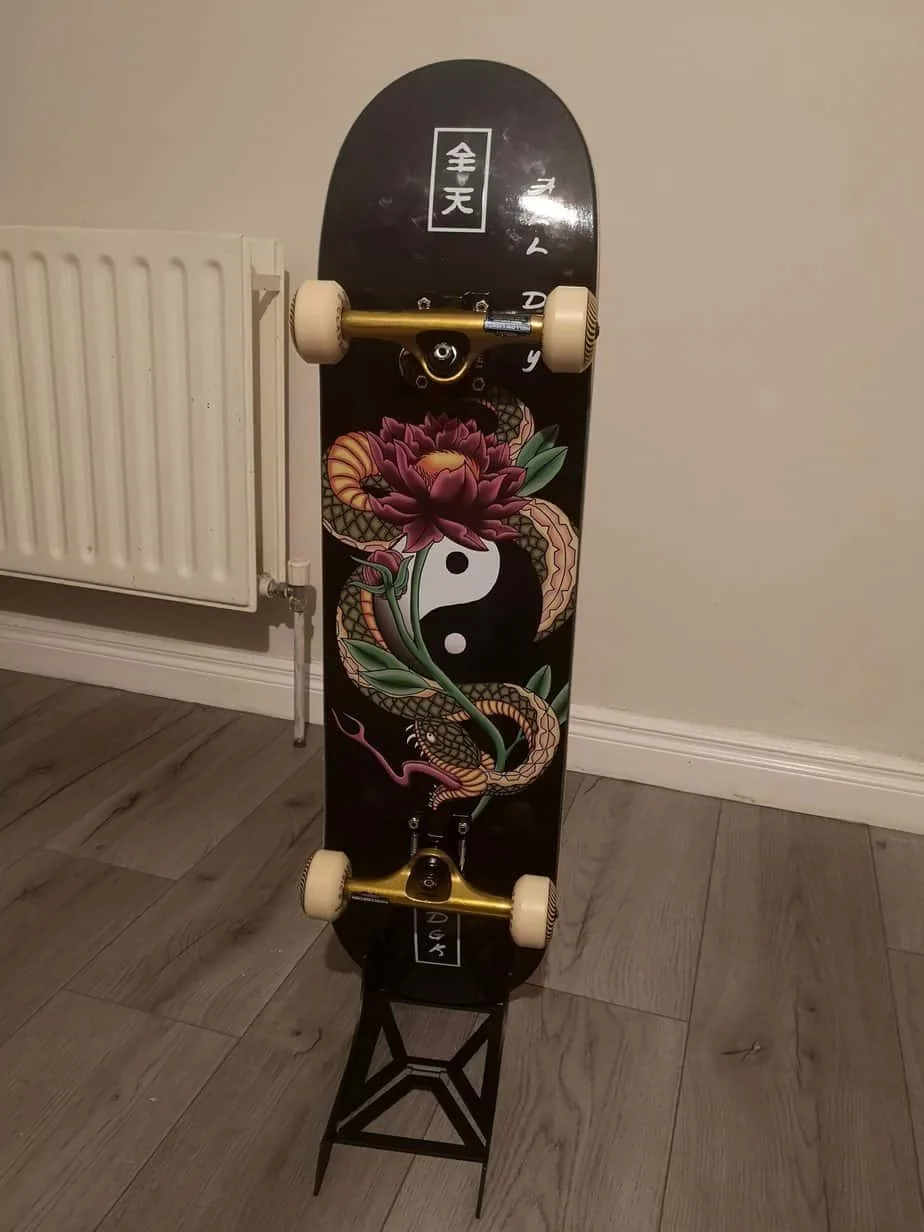
Deck: DGK VIPER LOGO 8.125″ DECK (BLACK)

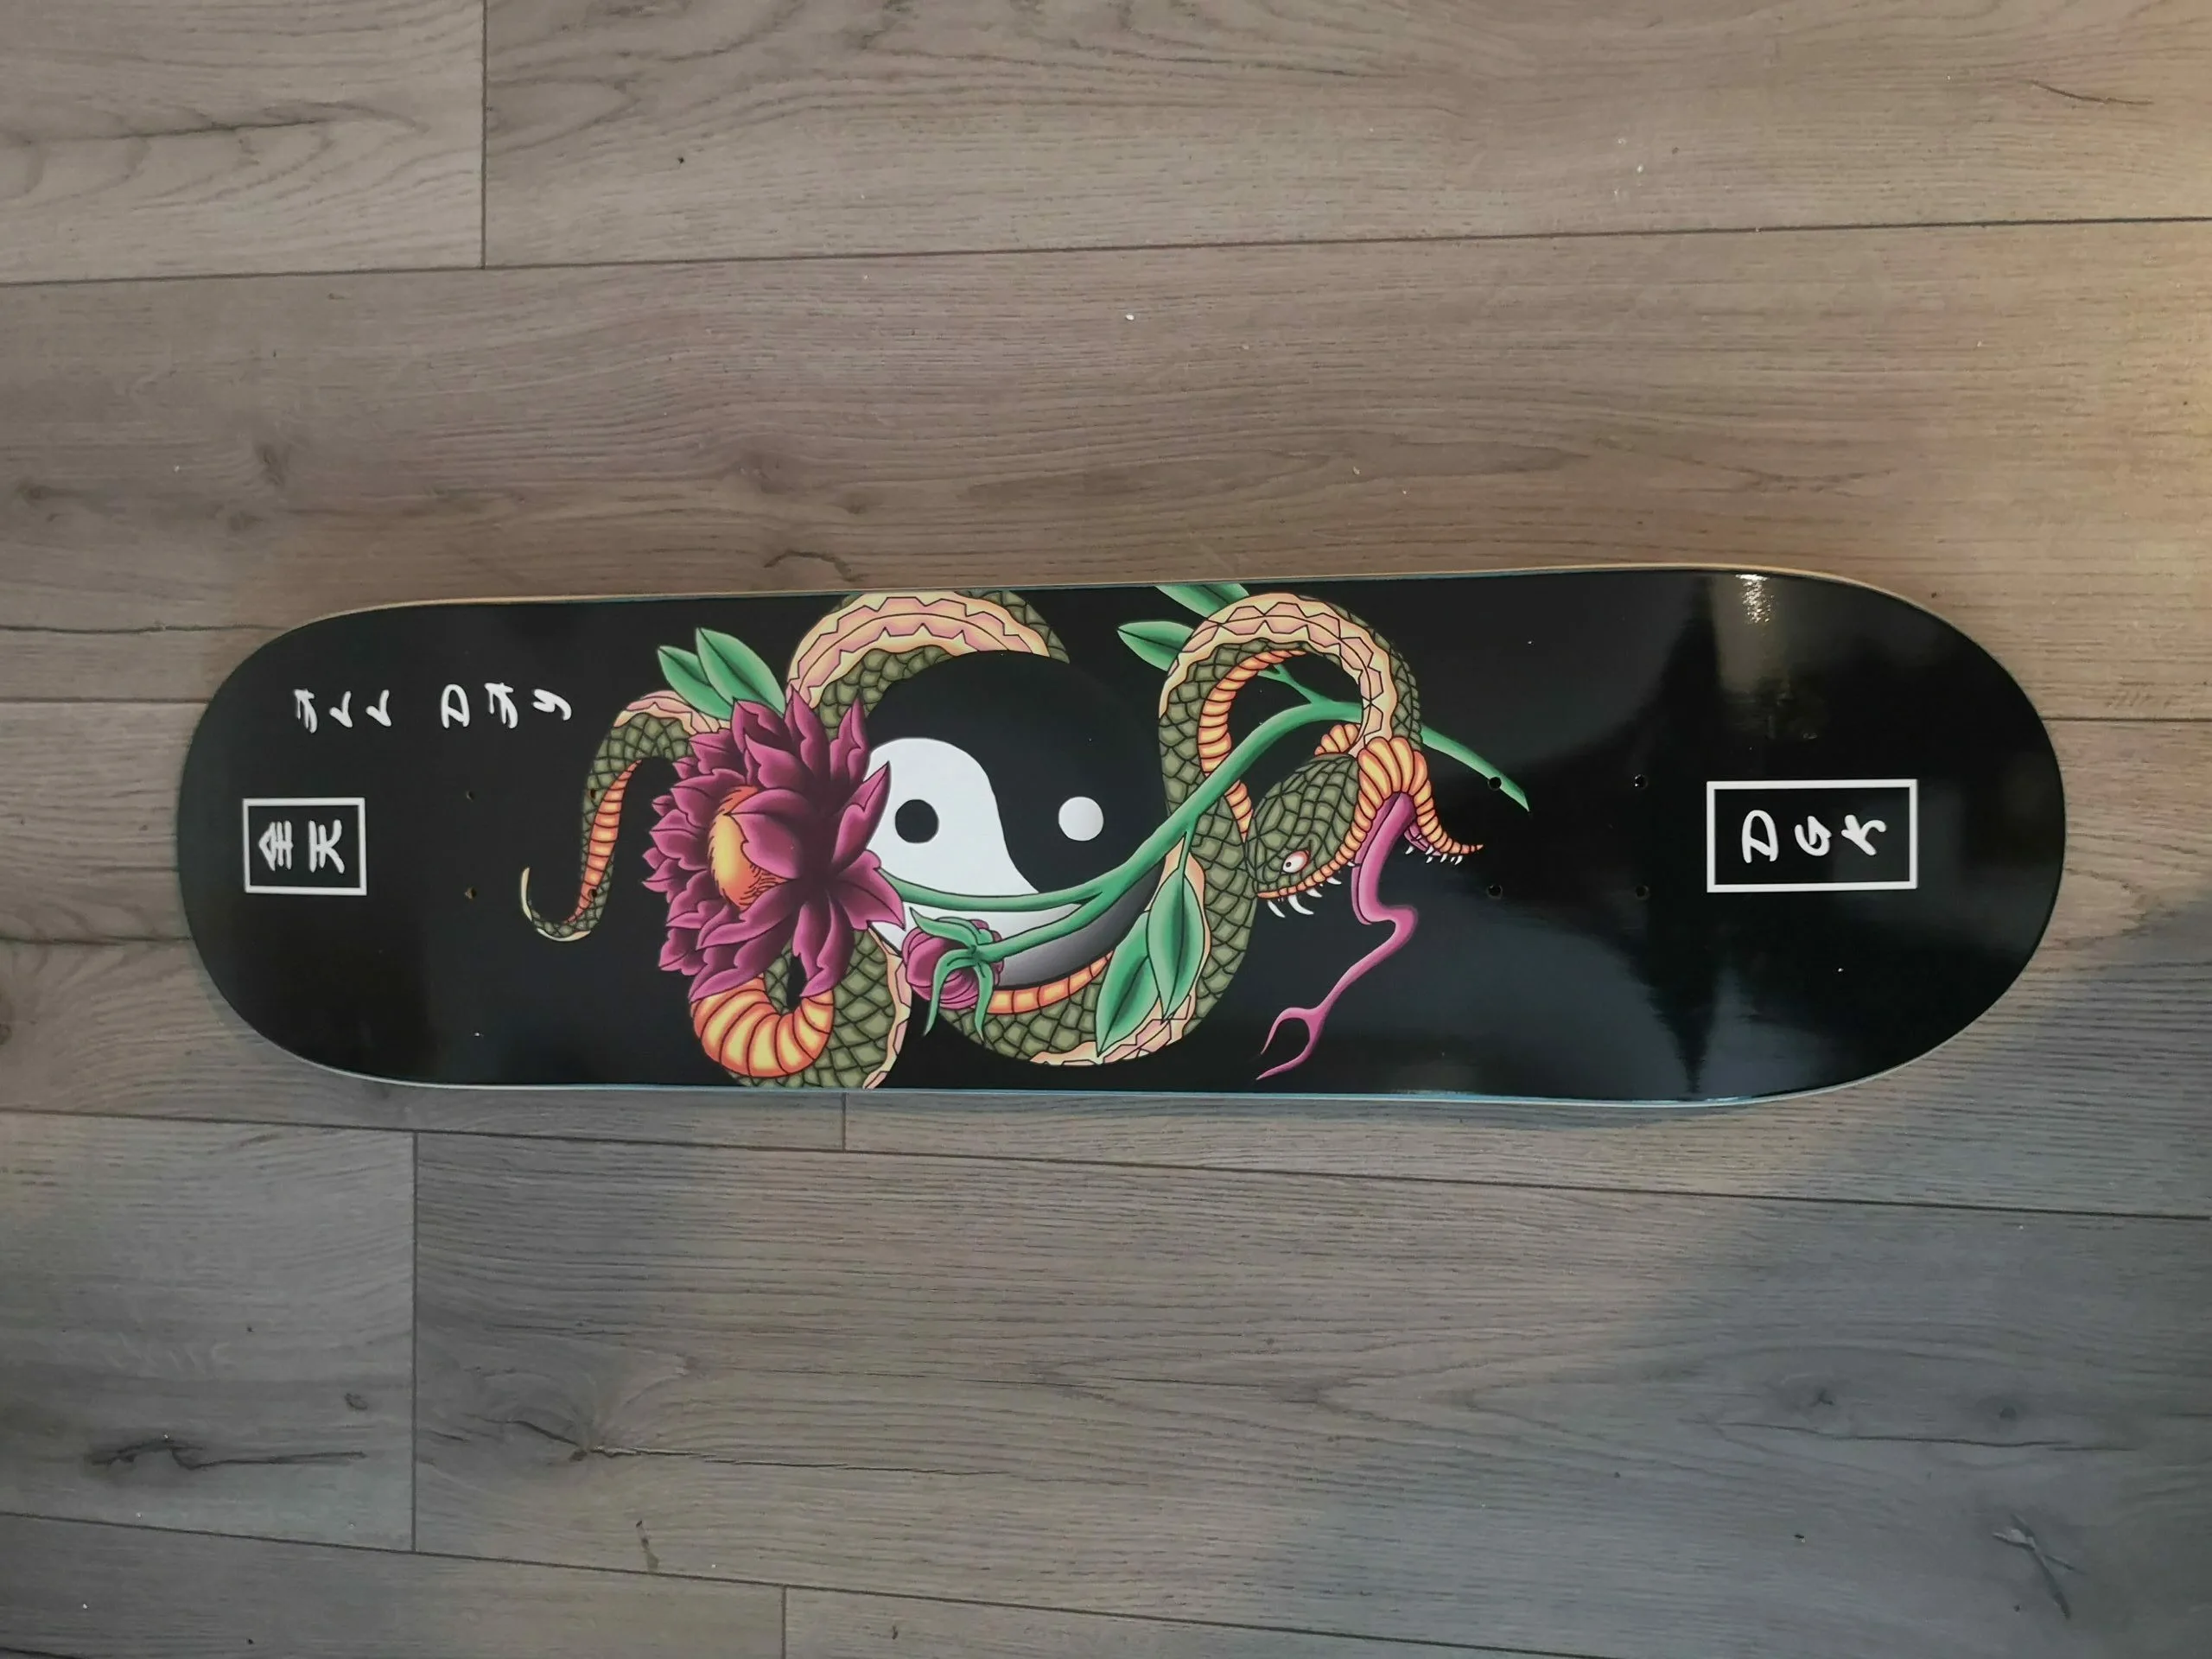
We begin with this gorgeous DGK deck known as the DGK Viper. DGK are a great skate brand that consistently makes great boards with sturdy Canadian Maple. Now, usually, the boards on offer from DGK are a little more loud and vibrant. The brand is best known for its Dirty Ghetto Kids replica brands series, where they take popular brands and real word entities and adapt them to provide a new, unique design. Examples of this are Ben and Jerry’s, Rice Krispies, and Call of Duty, to name a few. However, we managed to find this gorgeous oriental style design that blends a subtle black background with a beautiful burst of color. As for the sizing, and 8.125 is ideal for me, but if you want a bigger board, you might want to look elsewhere.
Best Alternative: Madness Perelson Birdie R7 Slick Skateboard Deck Multi 8.375″

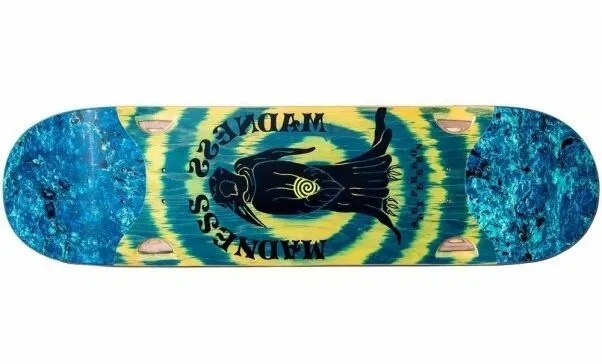
I personally own this one, too, for when I want to move up a size, and it’s an awesome board. I love the little cutouts that prevent wheel bite, and best of all, these cutouts don’t compromise the strength of the board. There are lots of great boards and brands out there, but this one has my personal recommendation.
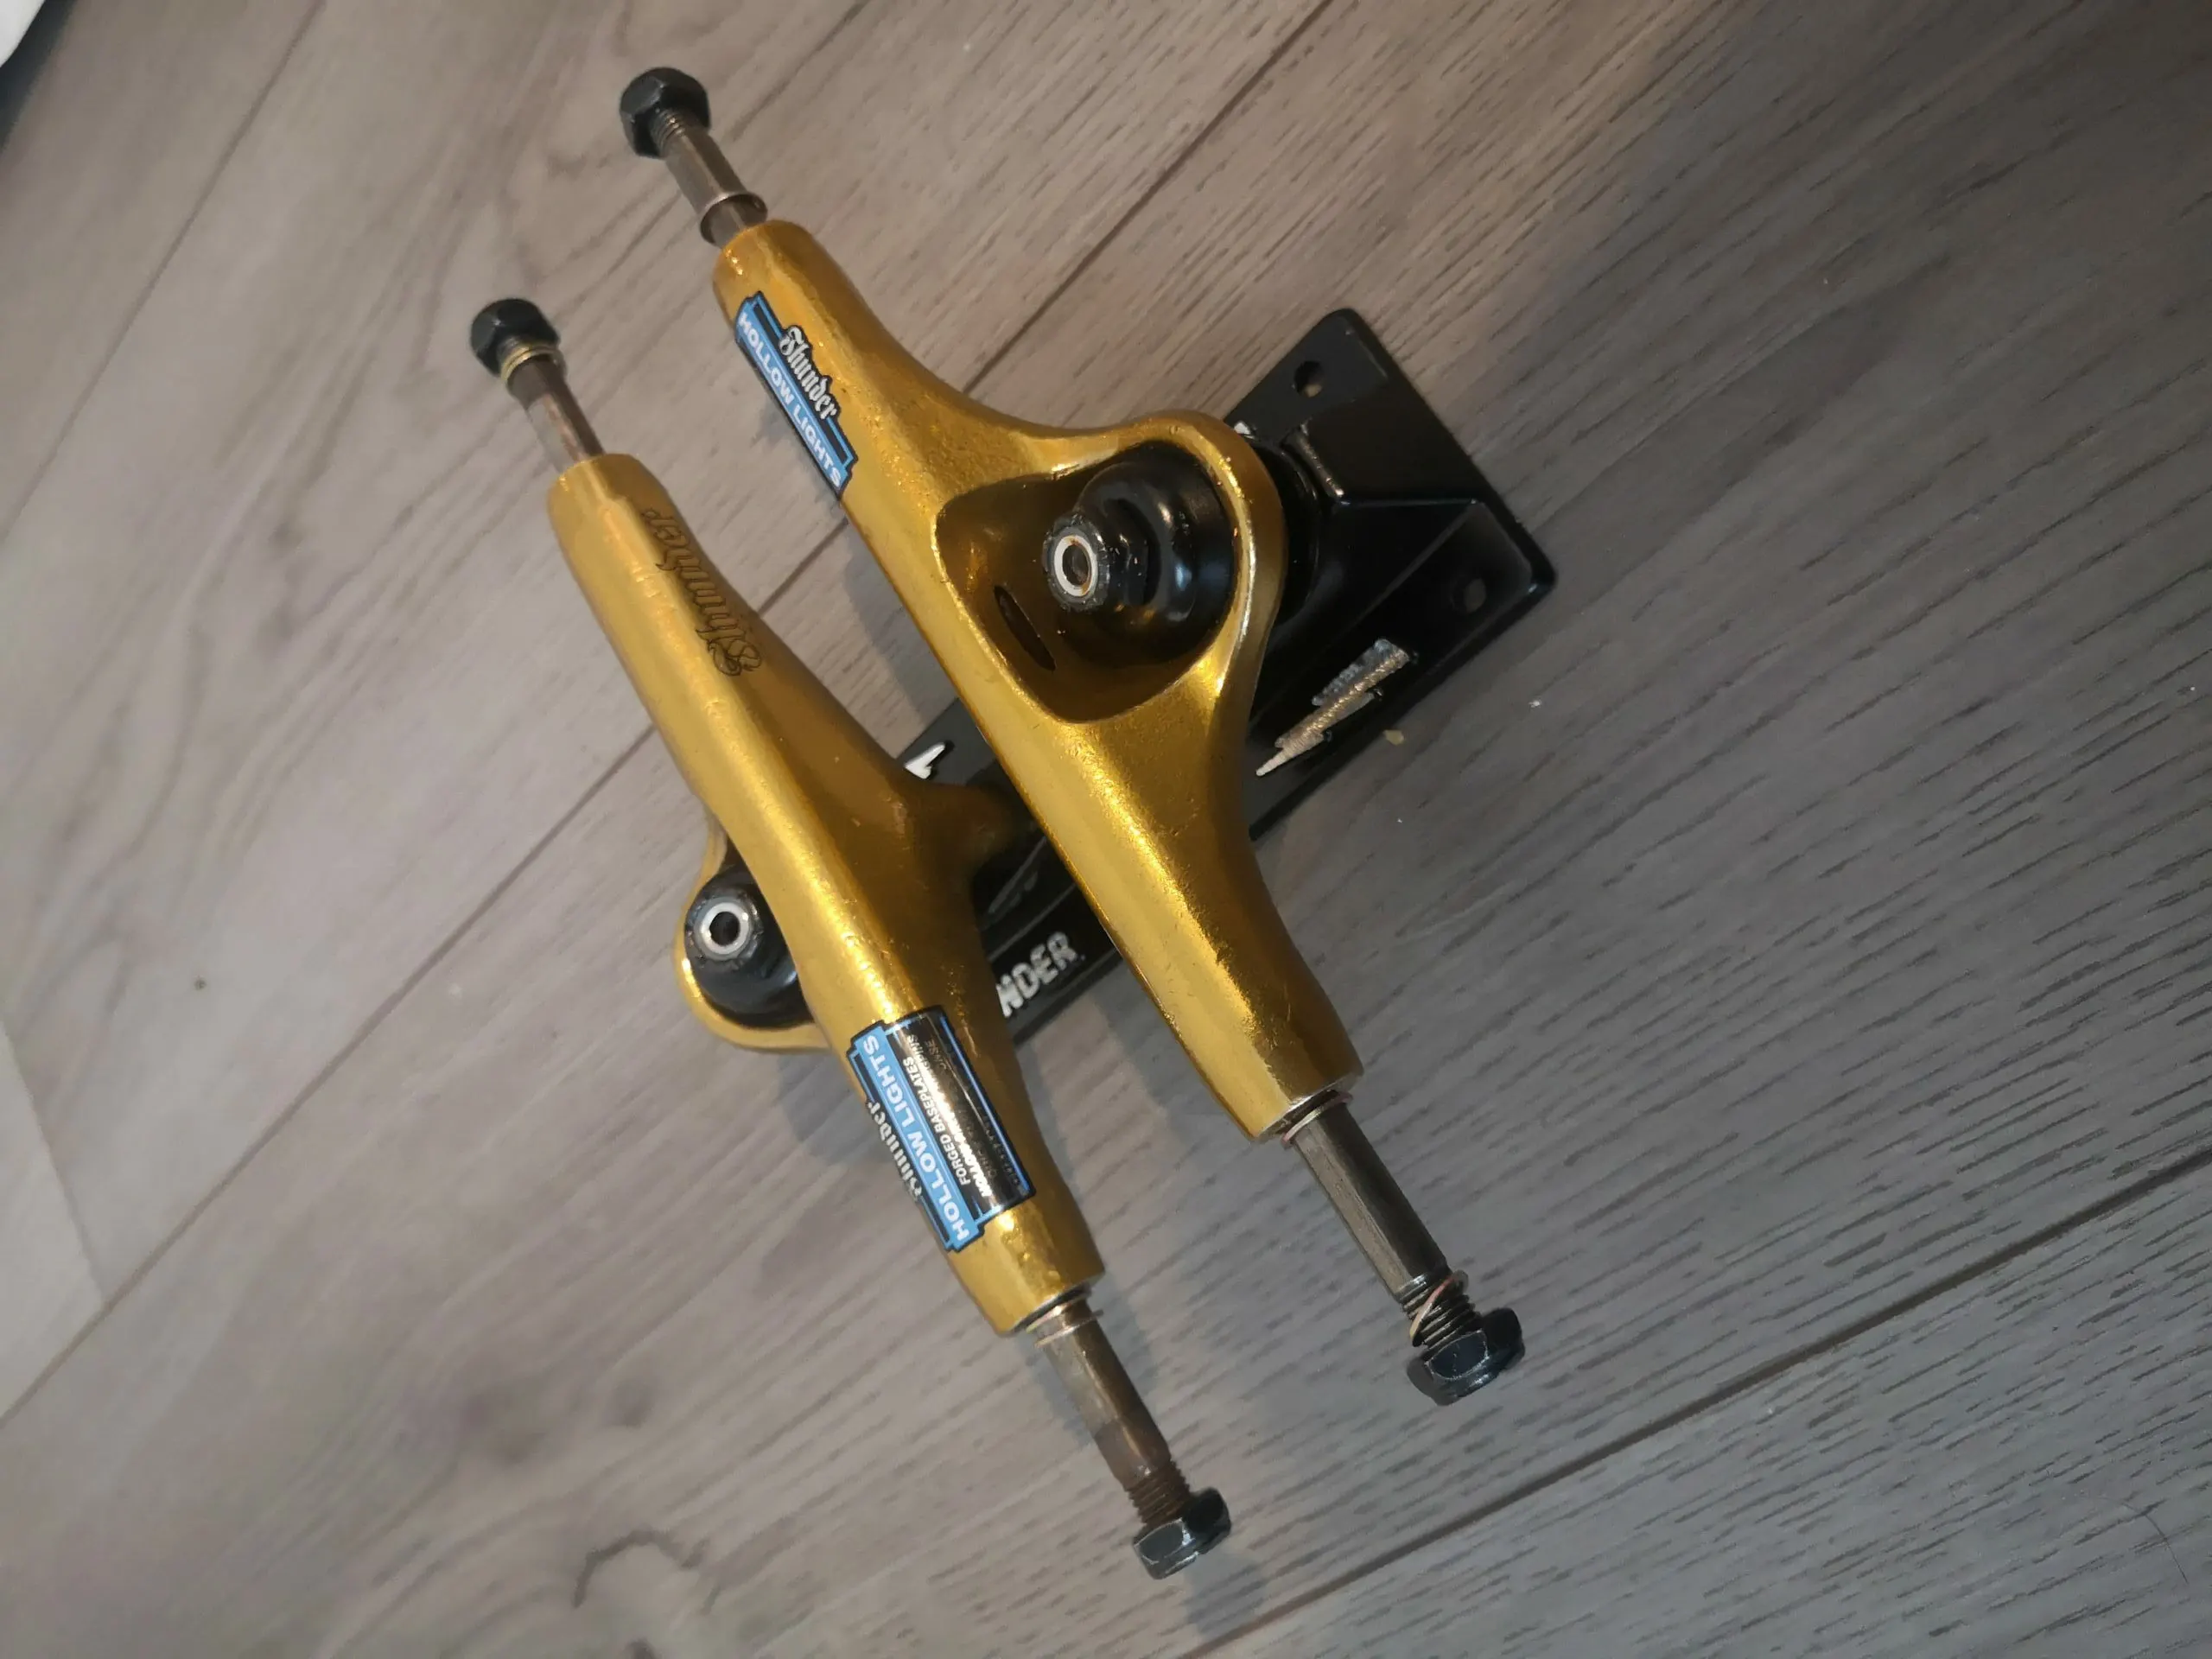
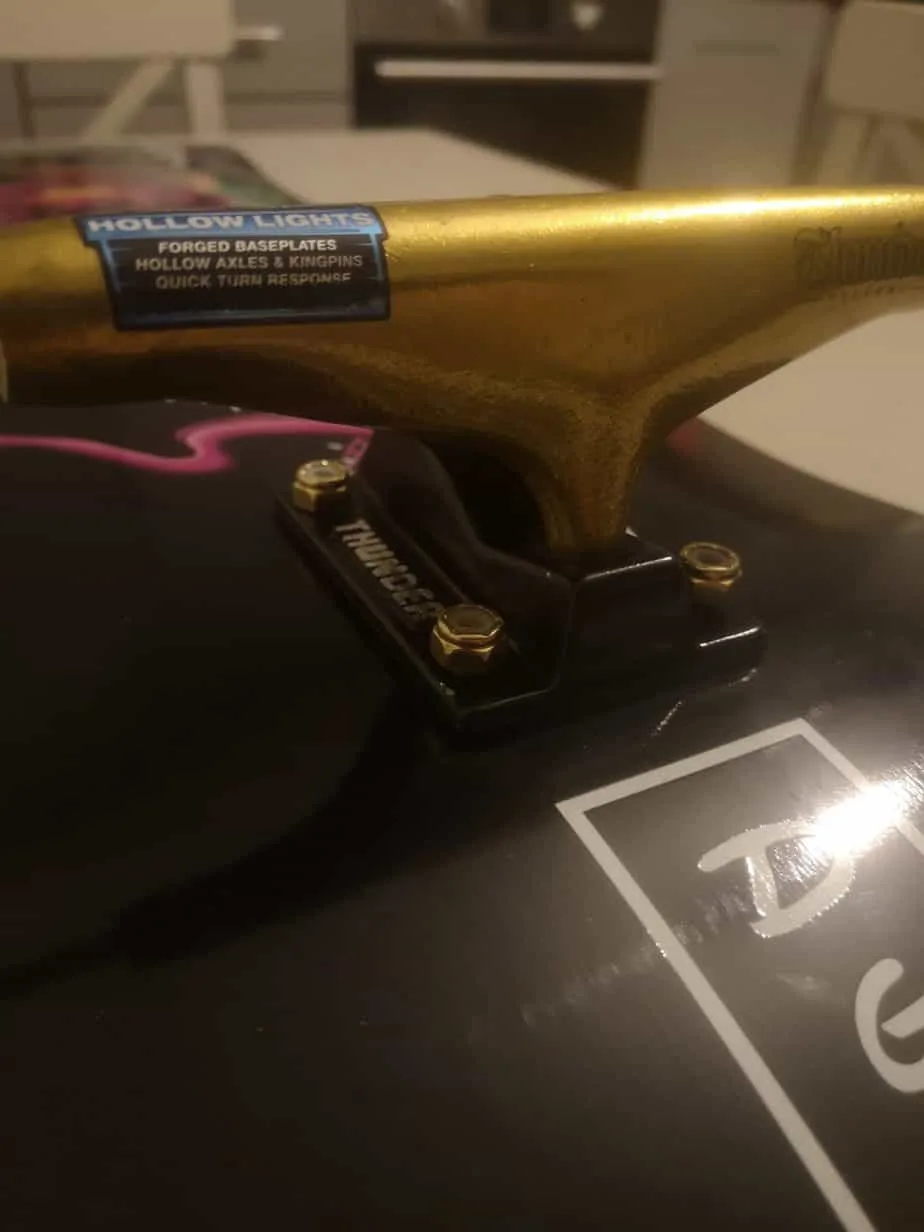
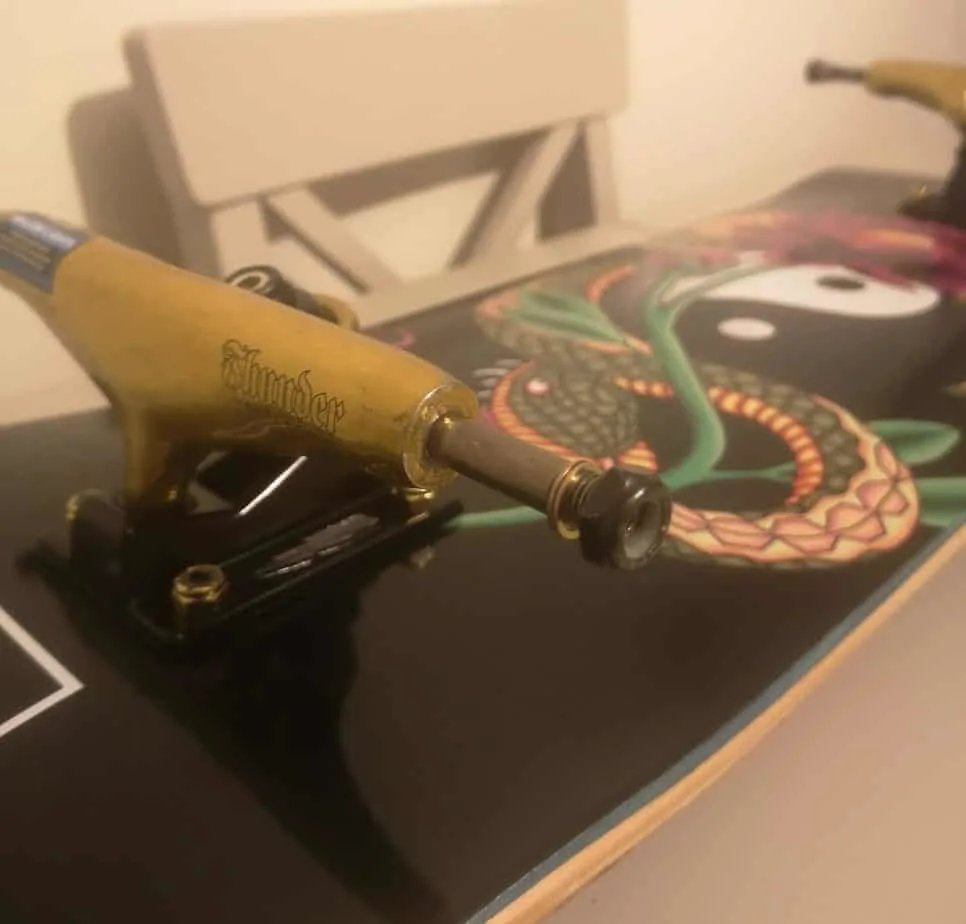
Thunder Hi-Lights 24-Karat Trucks, Gold/Black

Talk about opulence. The moment I slapped these on this board, I fell in love with these Thunder Hollow Lights. Not only are they a really sturdy build, equipped with great bushings out the box and a great fit for my board at 148mm. They also look incredible with that luxurious golden finish. I know that each 50-50 I do will be like a knife to the heart, but thanks to these images, I will always have the memories.
Best Alternative: INDEPENDENT 159 STAGE 11 SKATEBOARD TRUCKS RAW SILVER (PAIR)

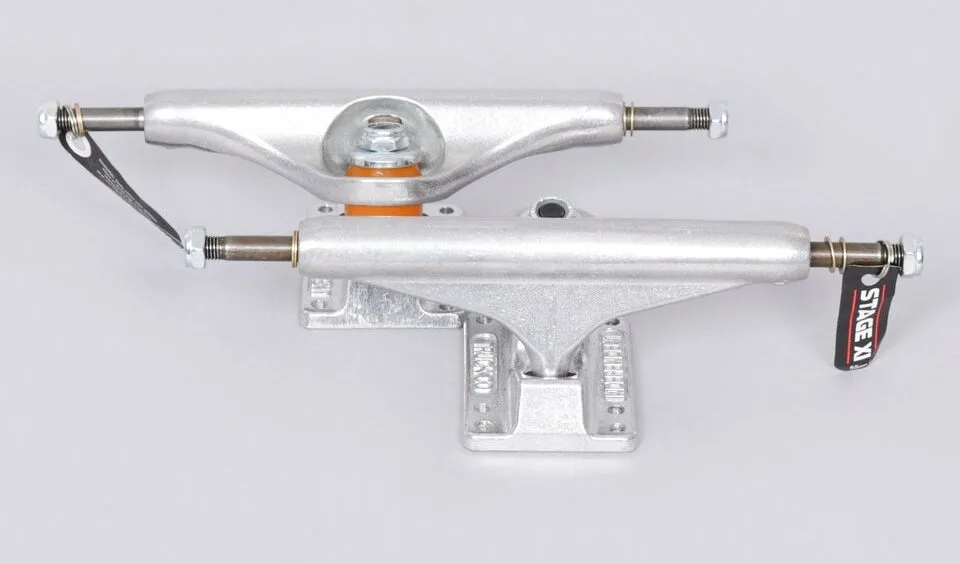
Again, I own these trucks too for my bigger boards, and I fully endorse these. When it comes to trucks, you just can’t go wrong with Independent Trucks. They are the most durable trucks in the business and a market leader for a reason. They consistently offer quality products to the skating community, and best of all, you get a lifetime guarantee. So if you somehow manage to snap these, Indy will probably just send you out a new pair, no questions asked.
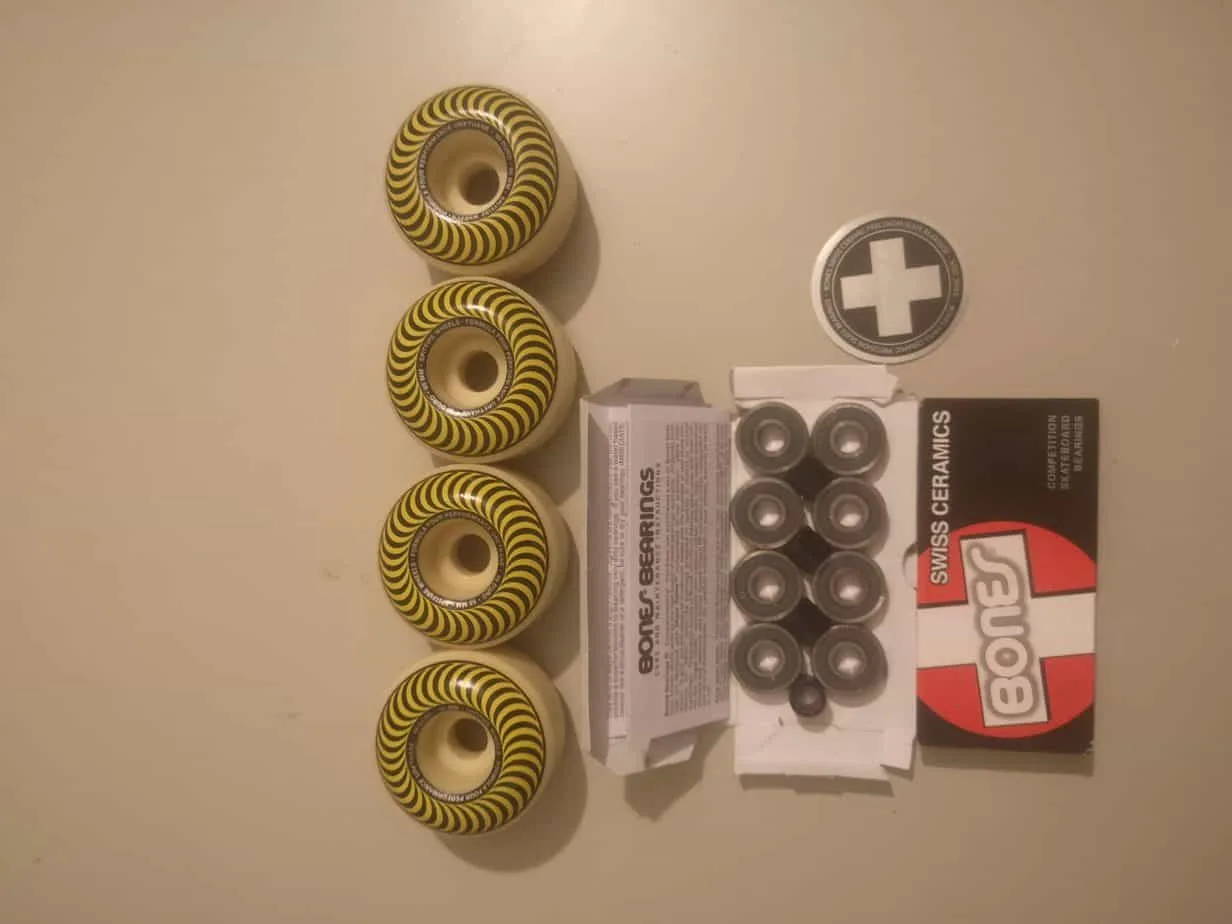
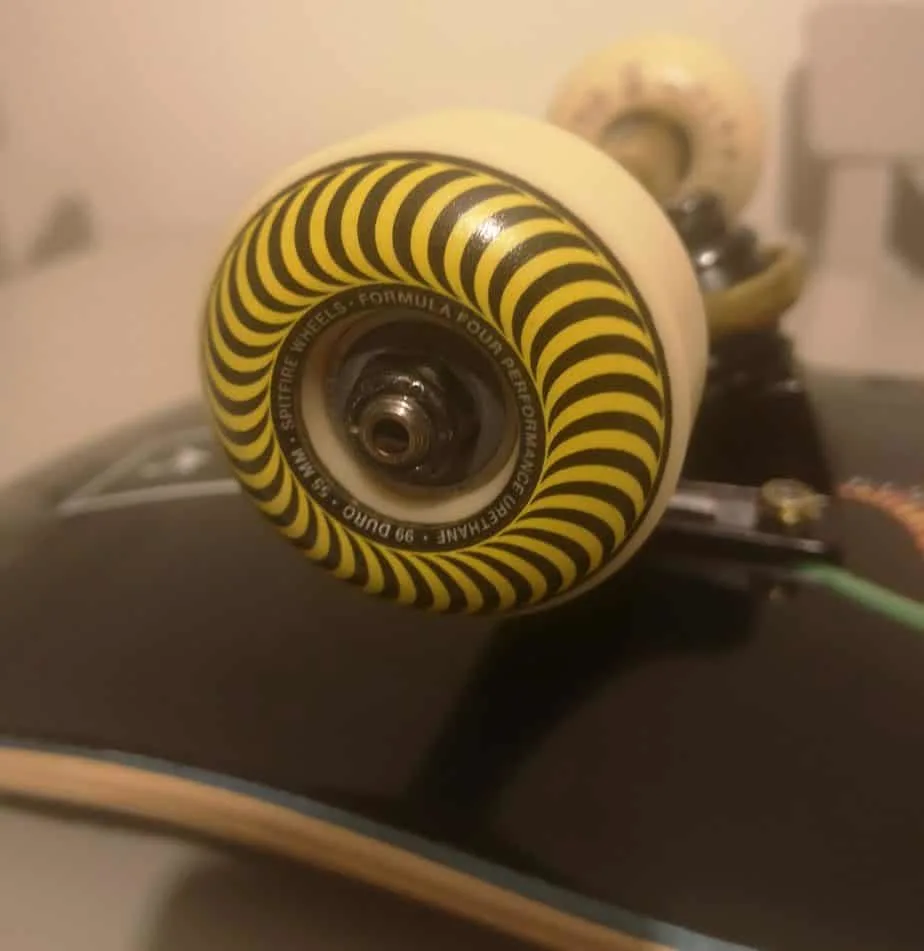
Wheels: SPITFIRE 55MM 99DU FORMULA FOUR CLASSICS WHEELS NATURAL / YELLOW

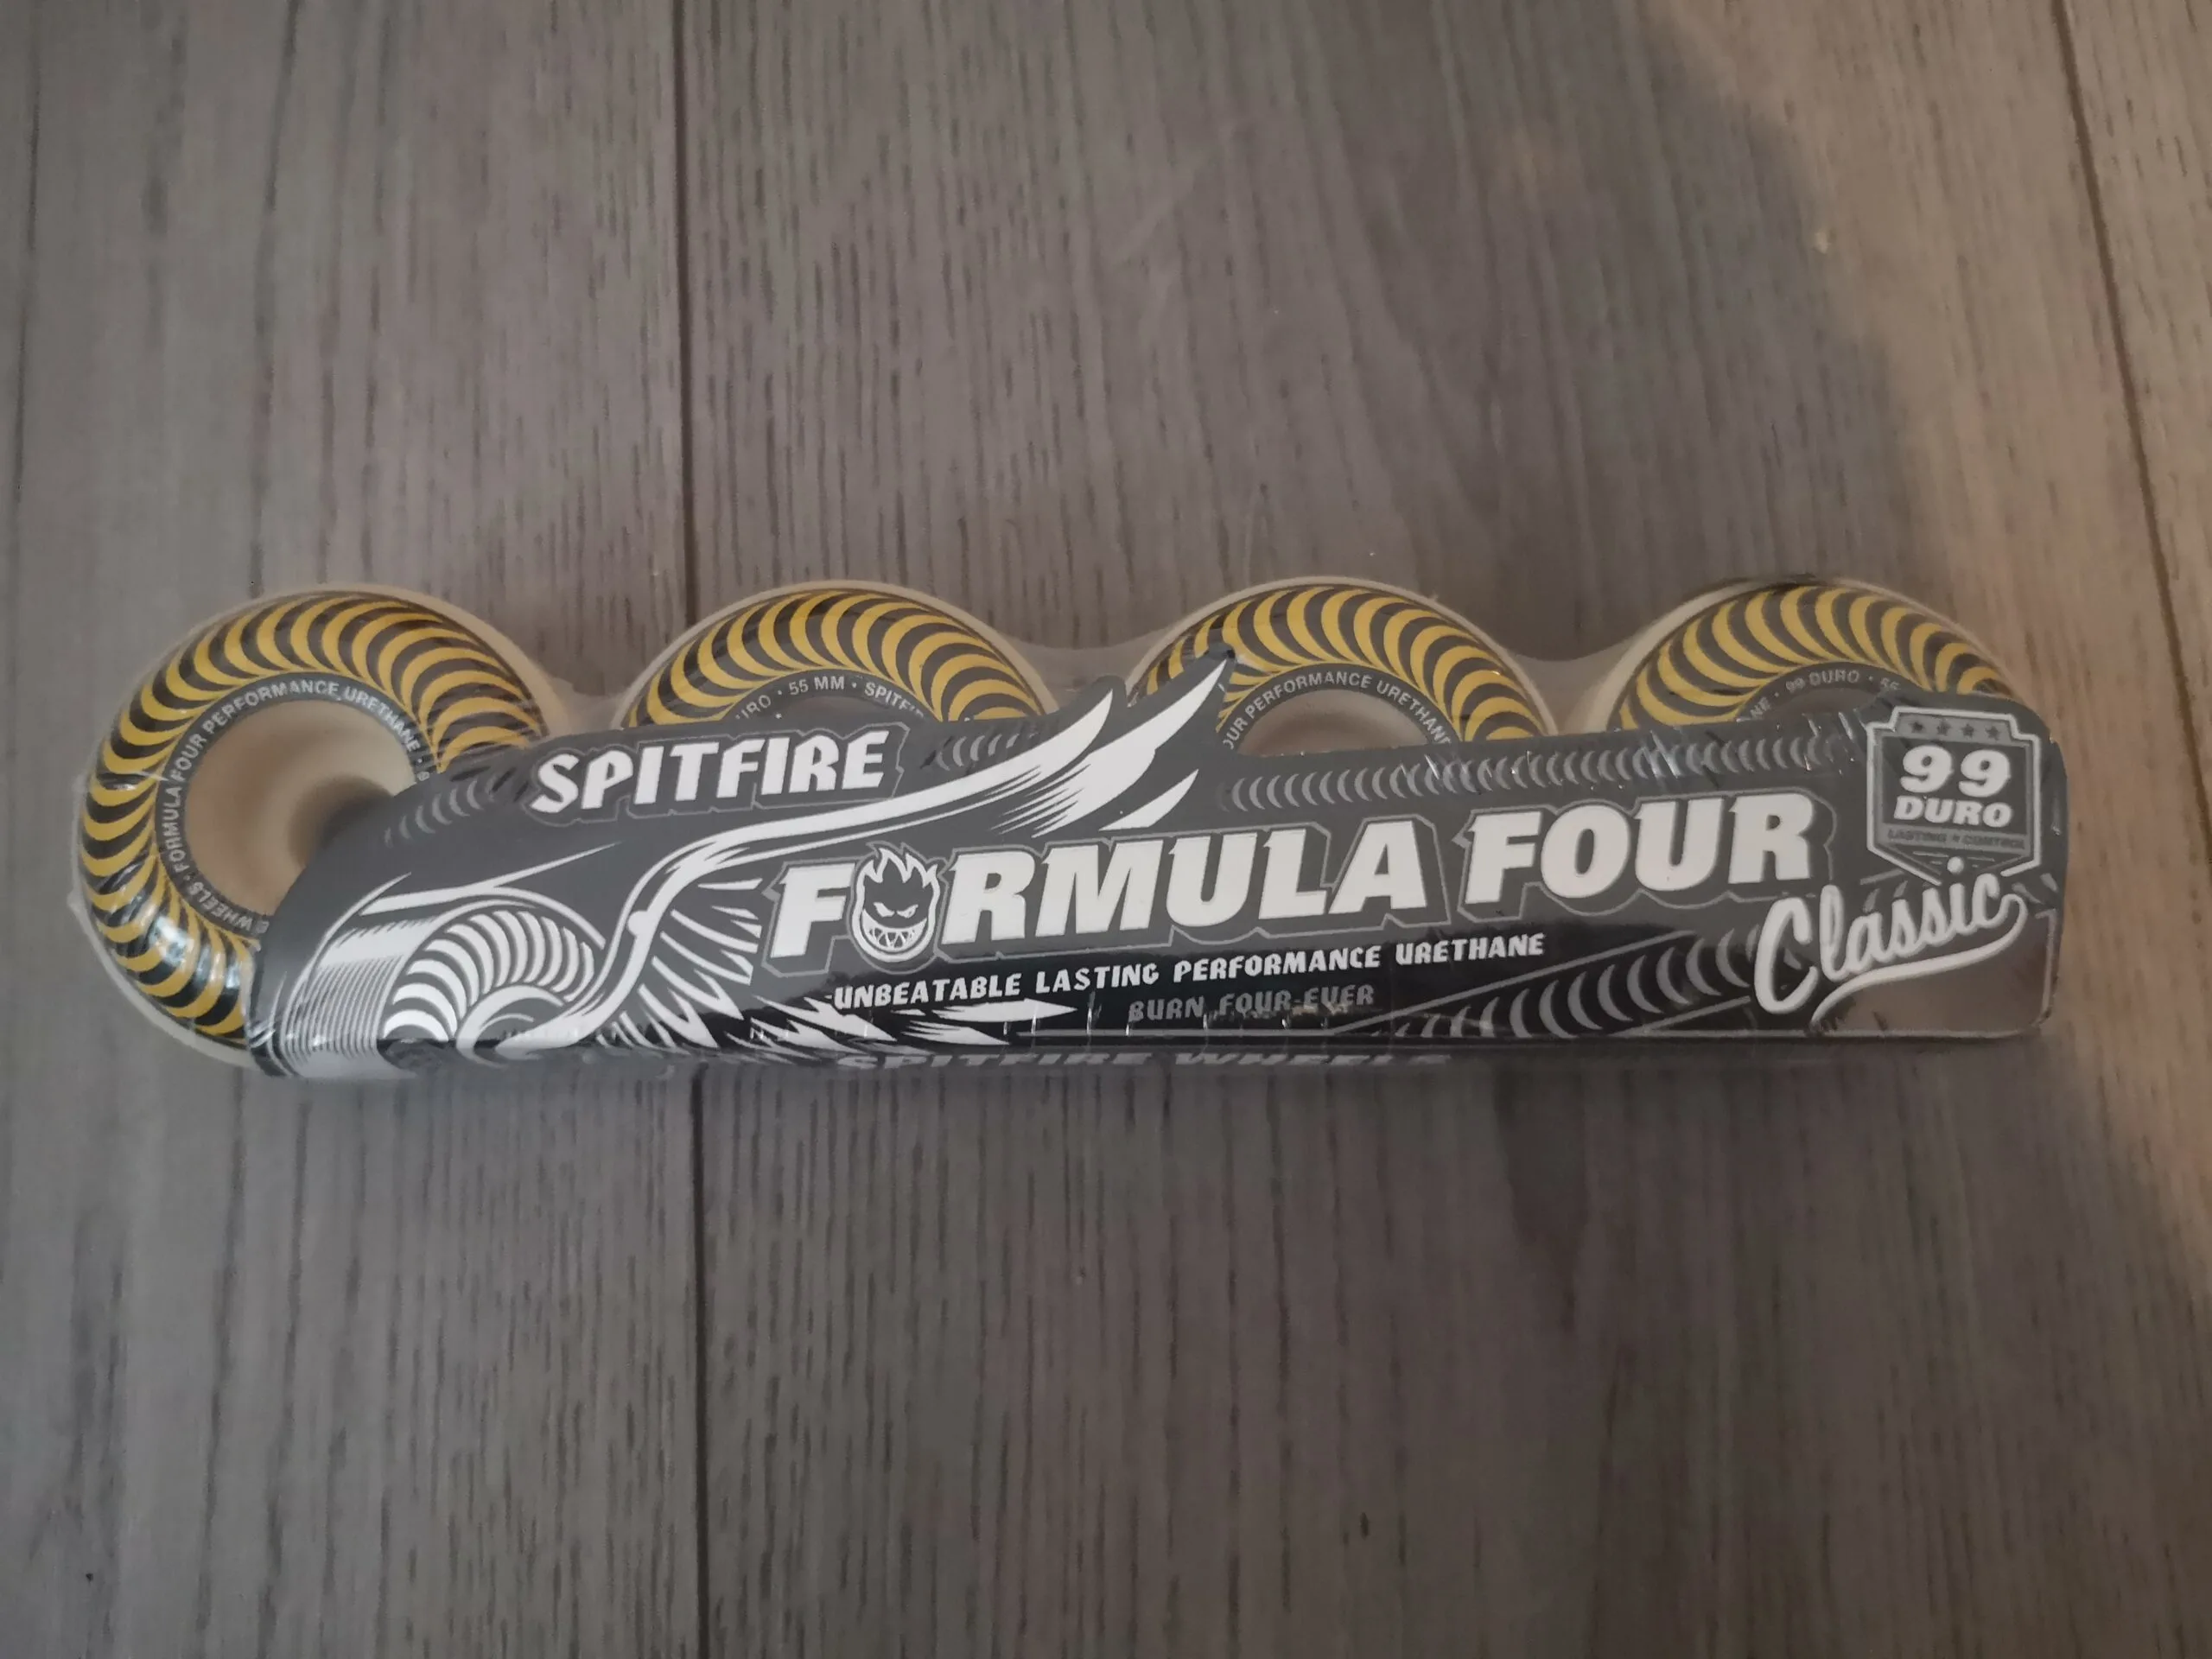
Next, we have these stunning Yellow Spitfire Classics. I wasn’t able to find a set of gold wheels that oozed class and quality in equal measure, but these Yellow Spitfire Classics are a great substitute and look great regardless. I know the print will be shredded of these wheels in no time, but I could watch the print on these wheels spin forever. Then in terms of quality, these bad boys are flat-spot proof, they lock into grinds brilliantly, and overall, they just do exactly what you want your wheels to do.
Best Alternative: BONES 52MM 100’S #4 V5 SIDECUT WHEELS WHITE / RED

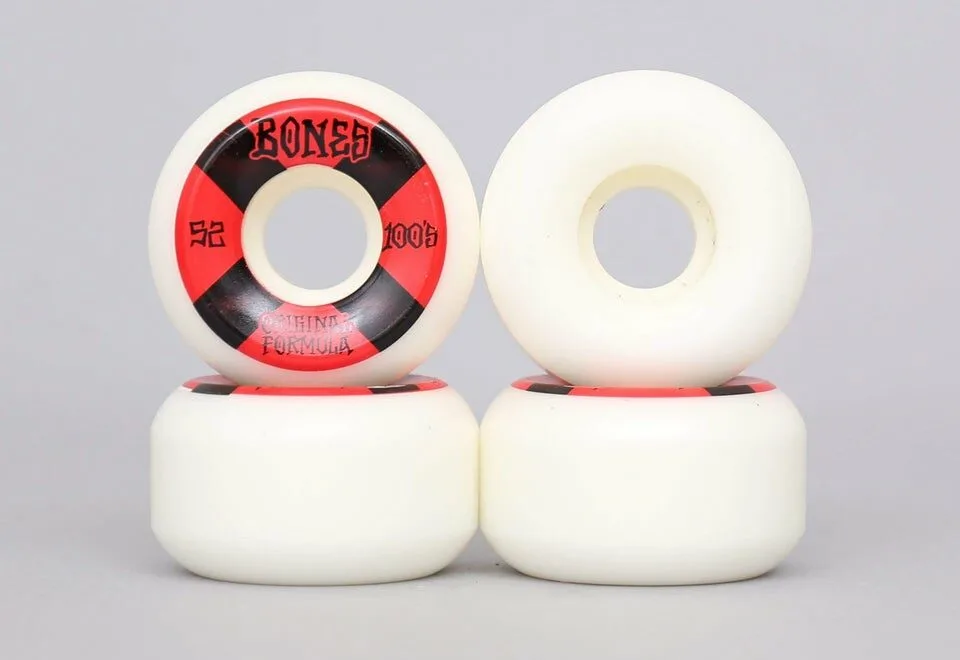
I like my wheels a little bigger, but if you want something in the standard 52/53mm range, then Bones is a great brand to go with. They are just as good as Spitfire wheels, look equally great, and tend to offer more outlandish designs. Other alternatives would be Santa Cruz Slime Balls, or for the budget skater, Mini Logo does a great wheel for beginners.
Bearings: Bones Swiss Bearings – Ceramic

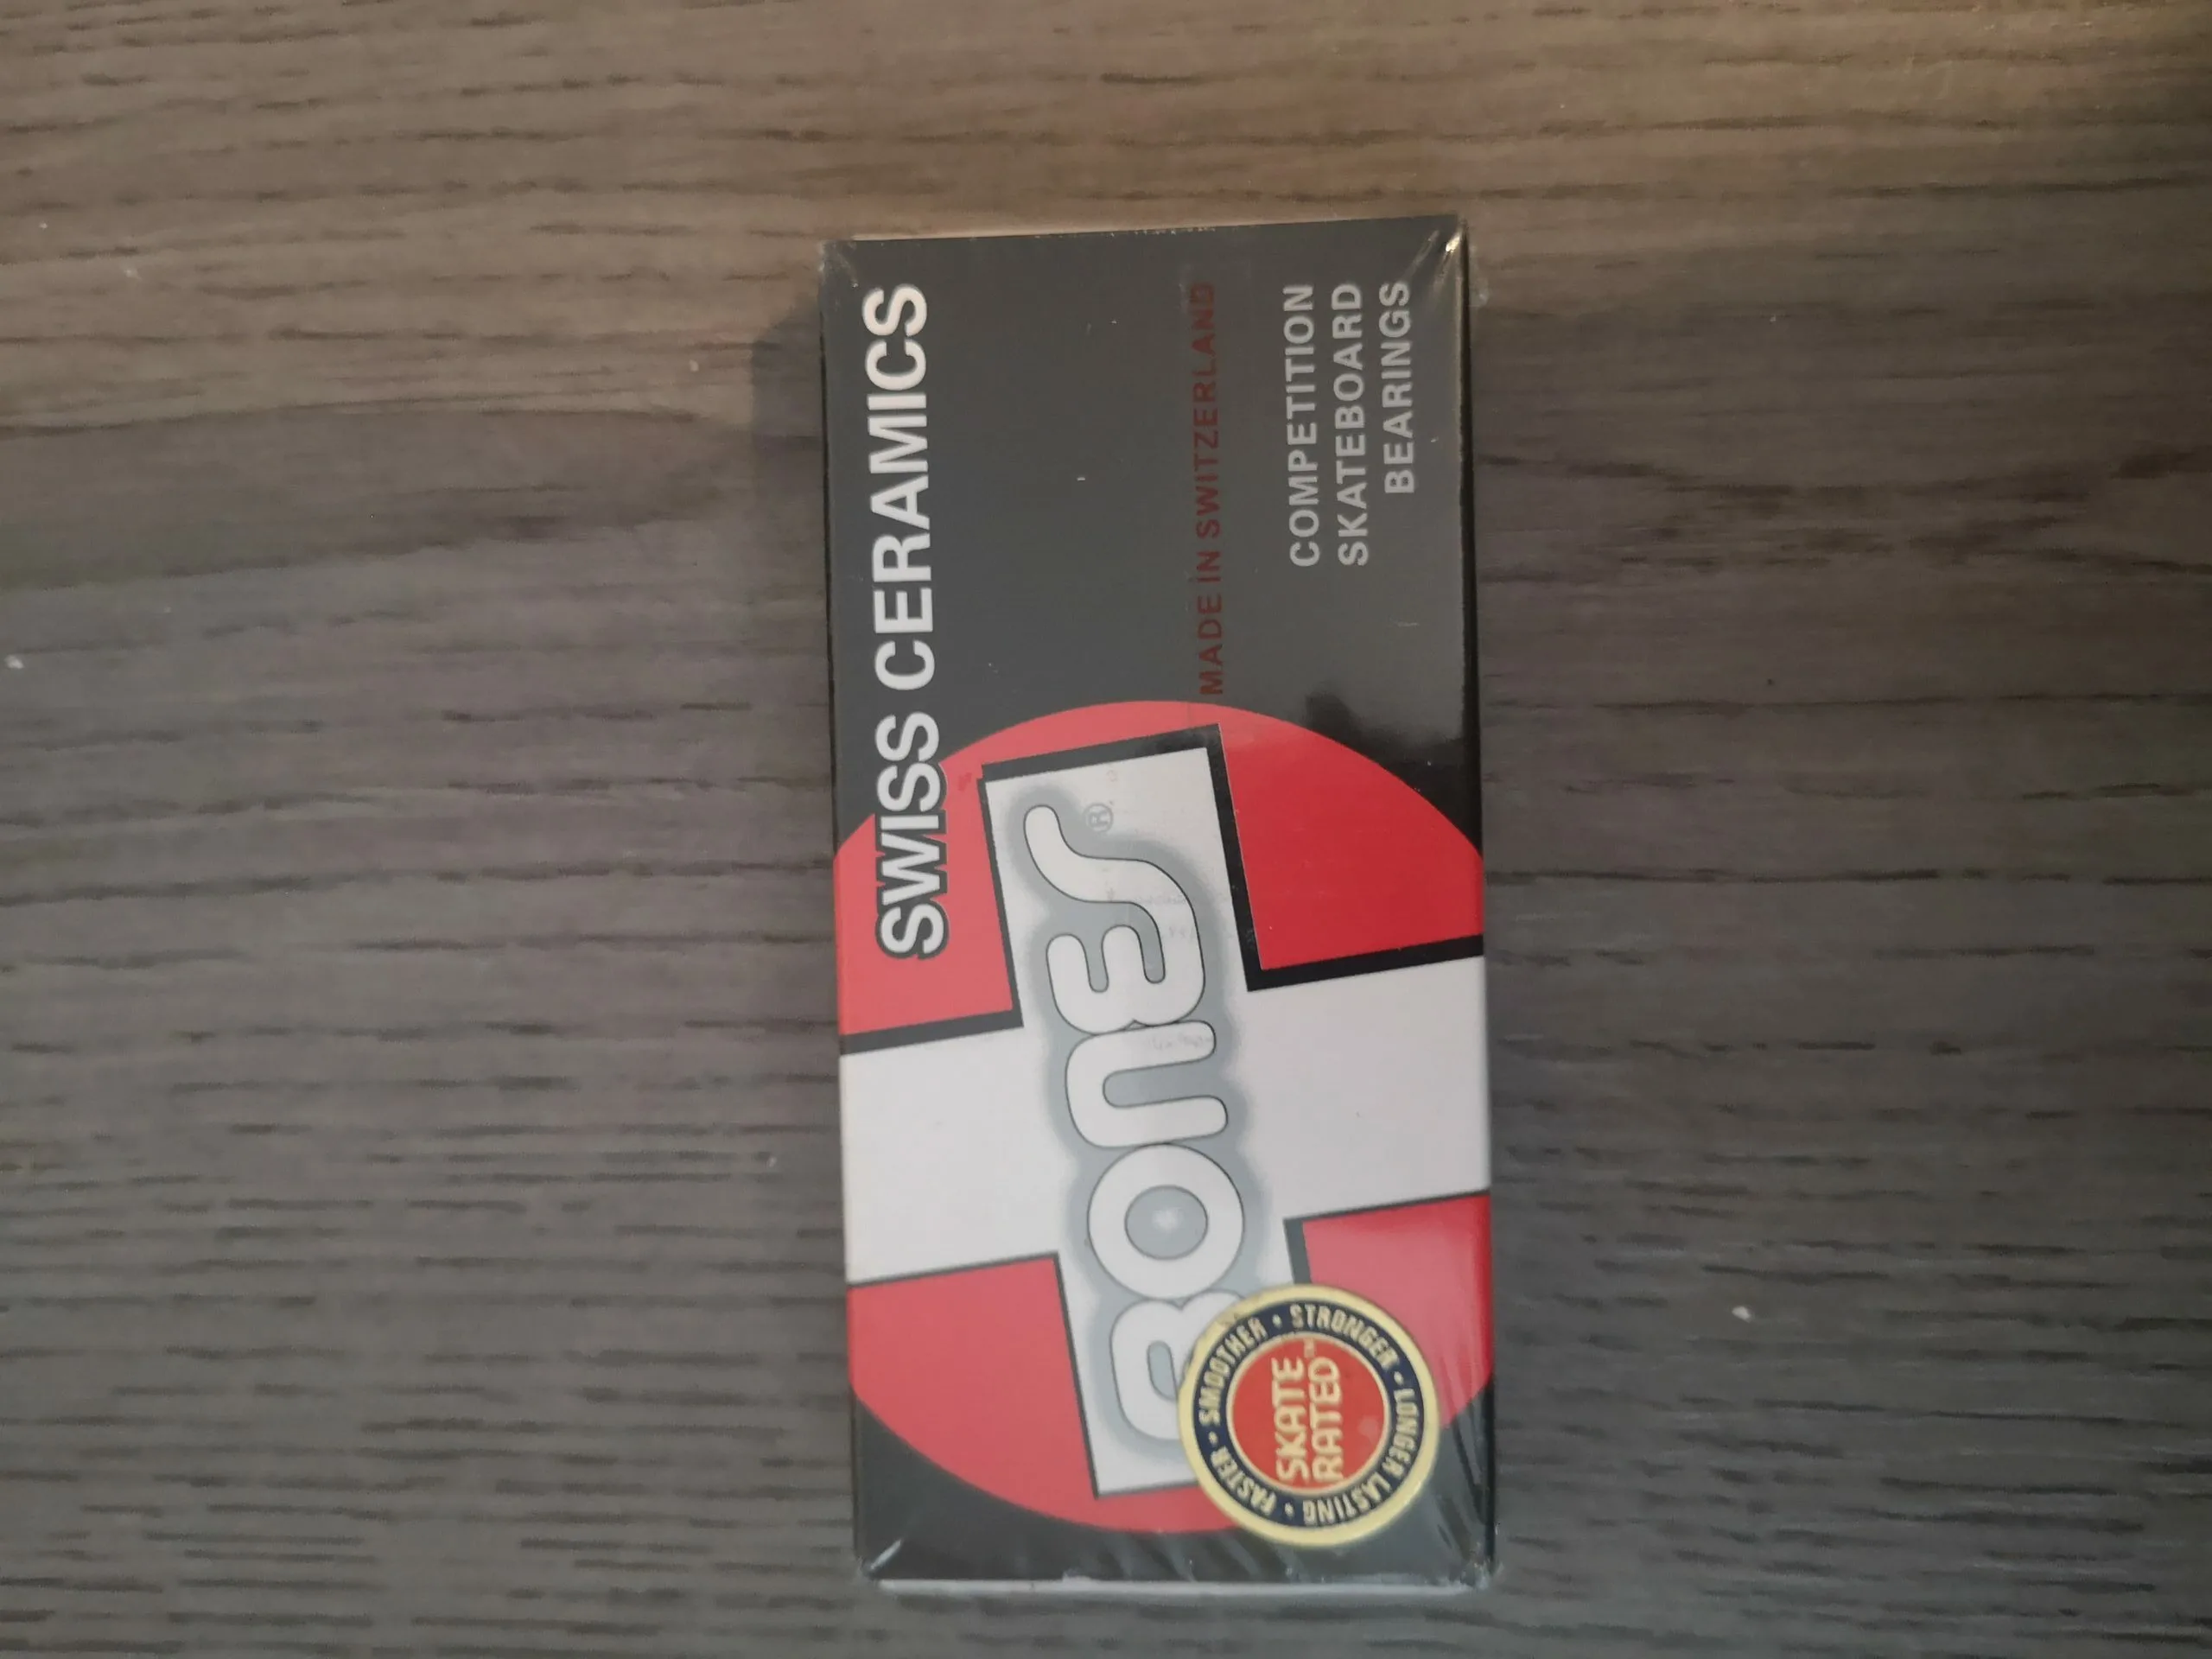
This is the part that stung the wallet the most, but for a good reason. You see, there are tiers to a good bearing, and once you enter the territory of Swiss-made ceramic bearings, you know you have a product that is the cream of the crop. This product comes pre-lubricated and with spacers. Then as for the bearings themselves, they spin fast and silky, making little to no sound at all. They may be expensive, but for the quality and durability you get, it’s worth the strain of the old purse strings.
Best Alternative: Andale Blues Bearings

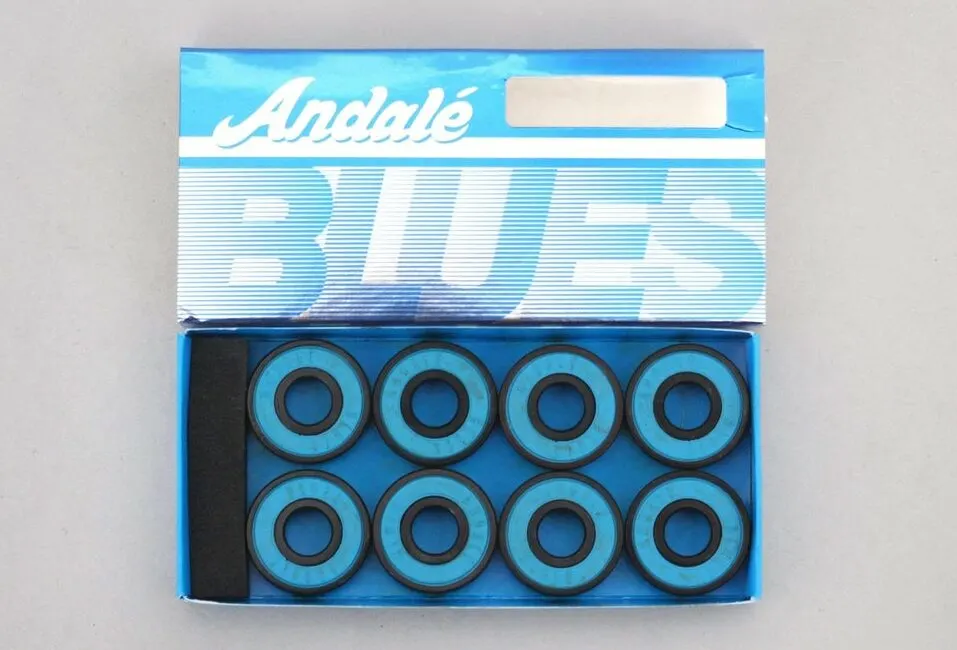
You probably assumed I would go with Bones Reds, as that is how most people would see it. However, I have to give props to P-Rod’s company Andale, they make some great stuff, and their standard Blues Bearings are great and, in my opinion, more durable and fast than Bones Reds.
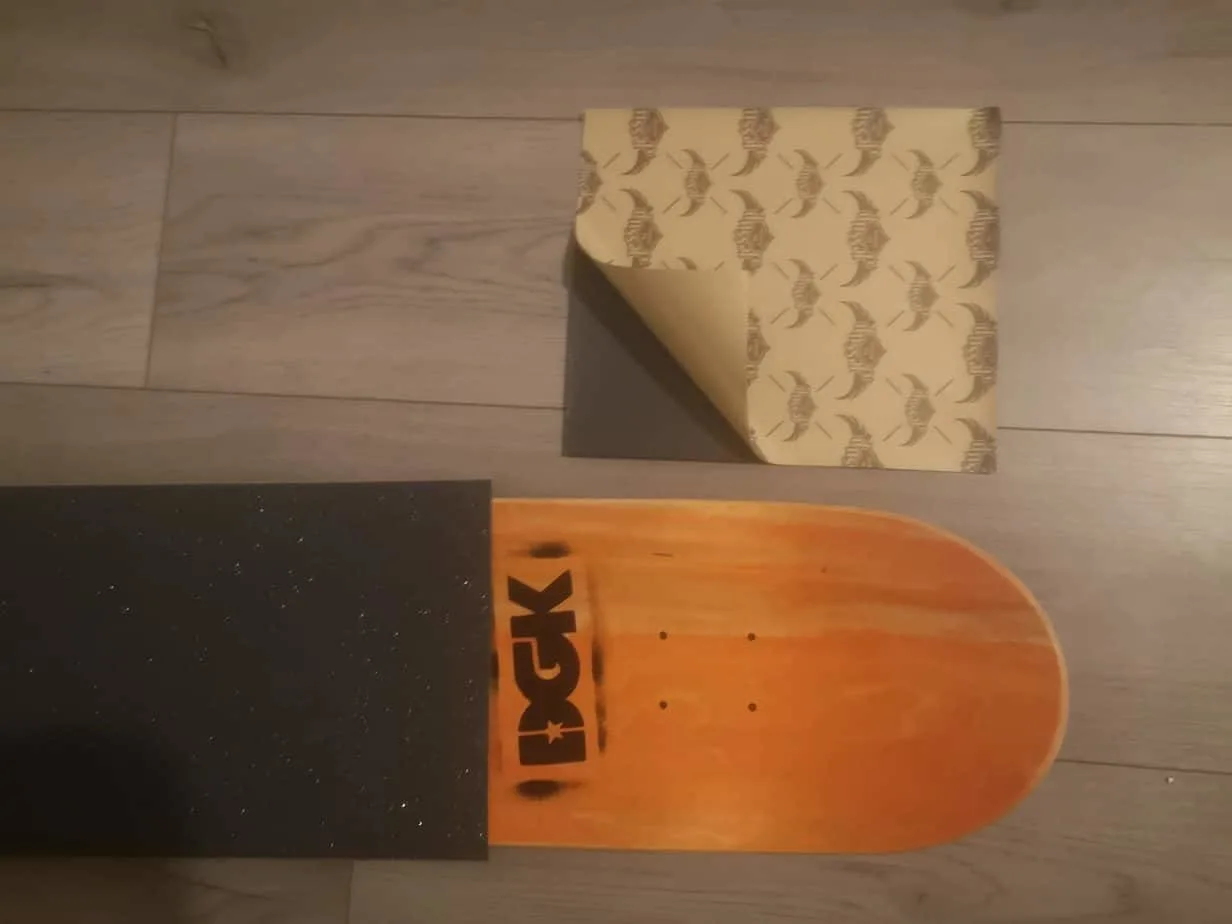
Grip Tape: JESSUP 9” SKATEBOARD GRIPTAPE BLACK

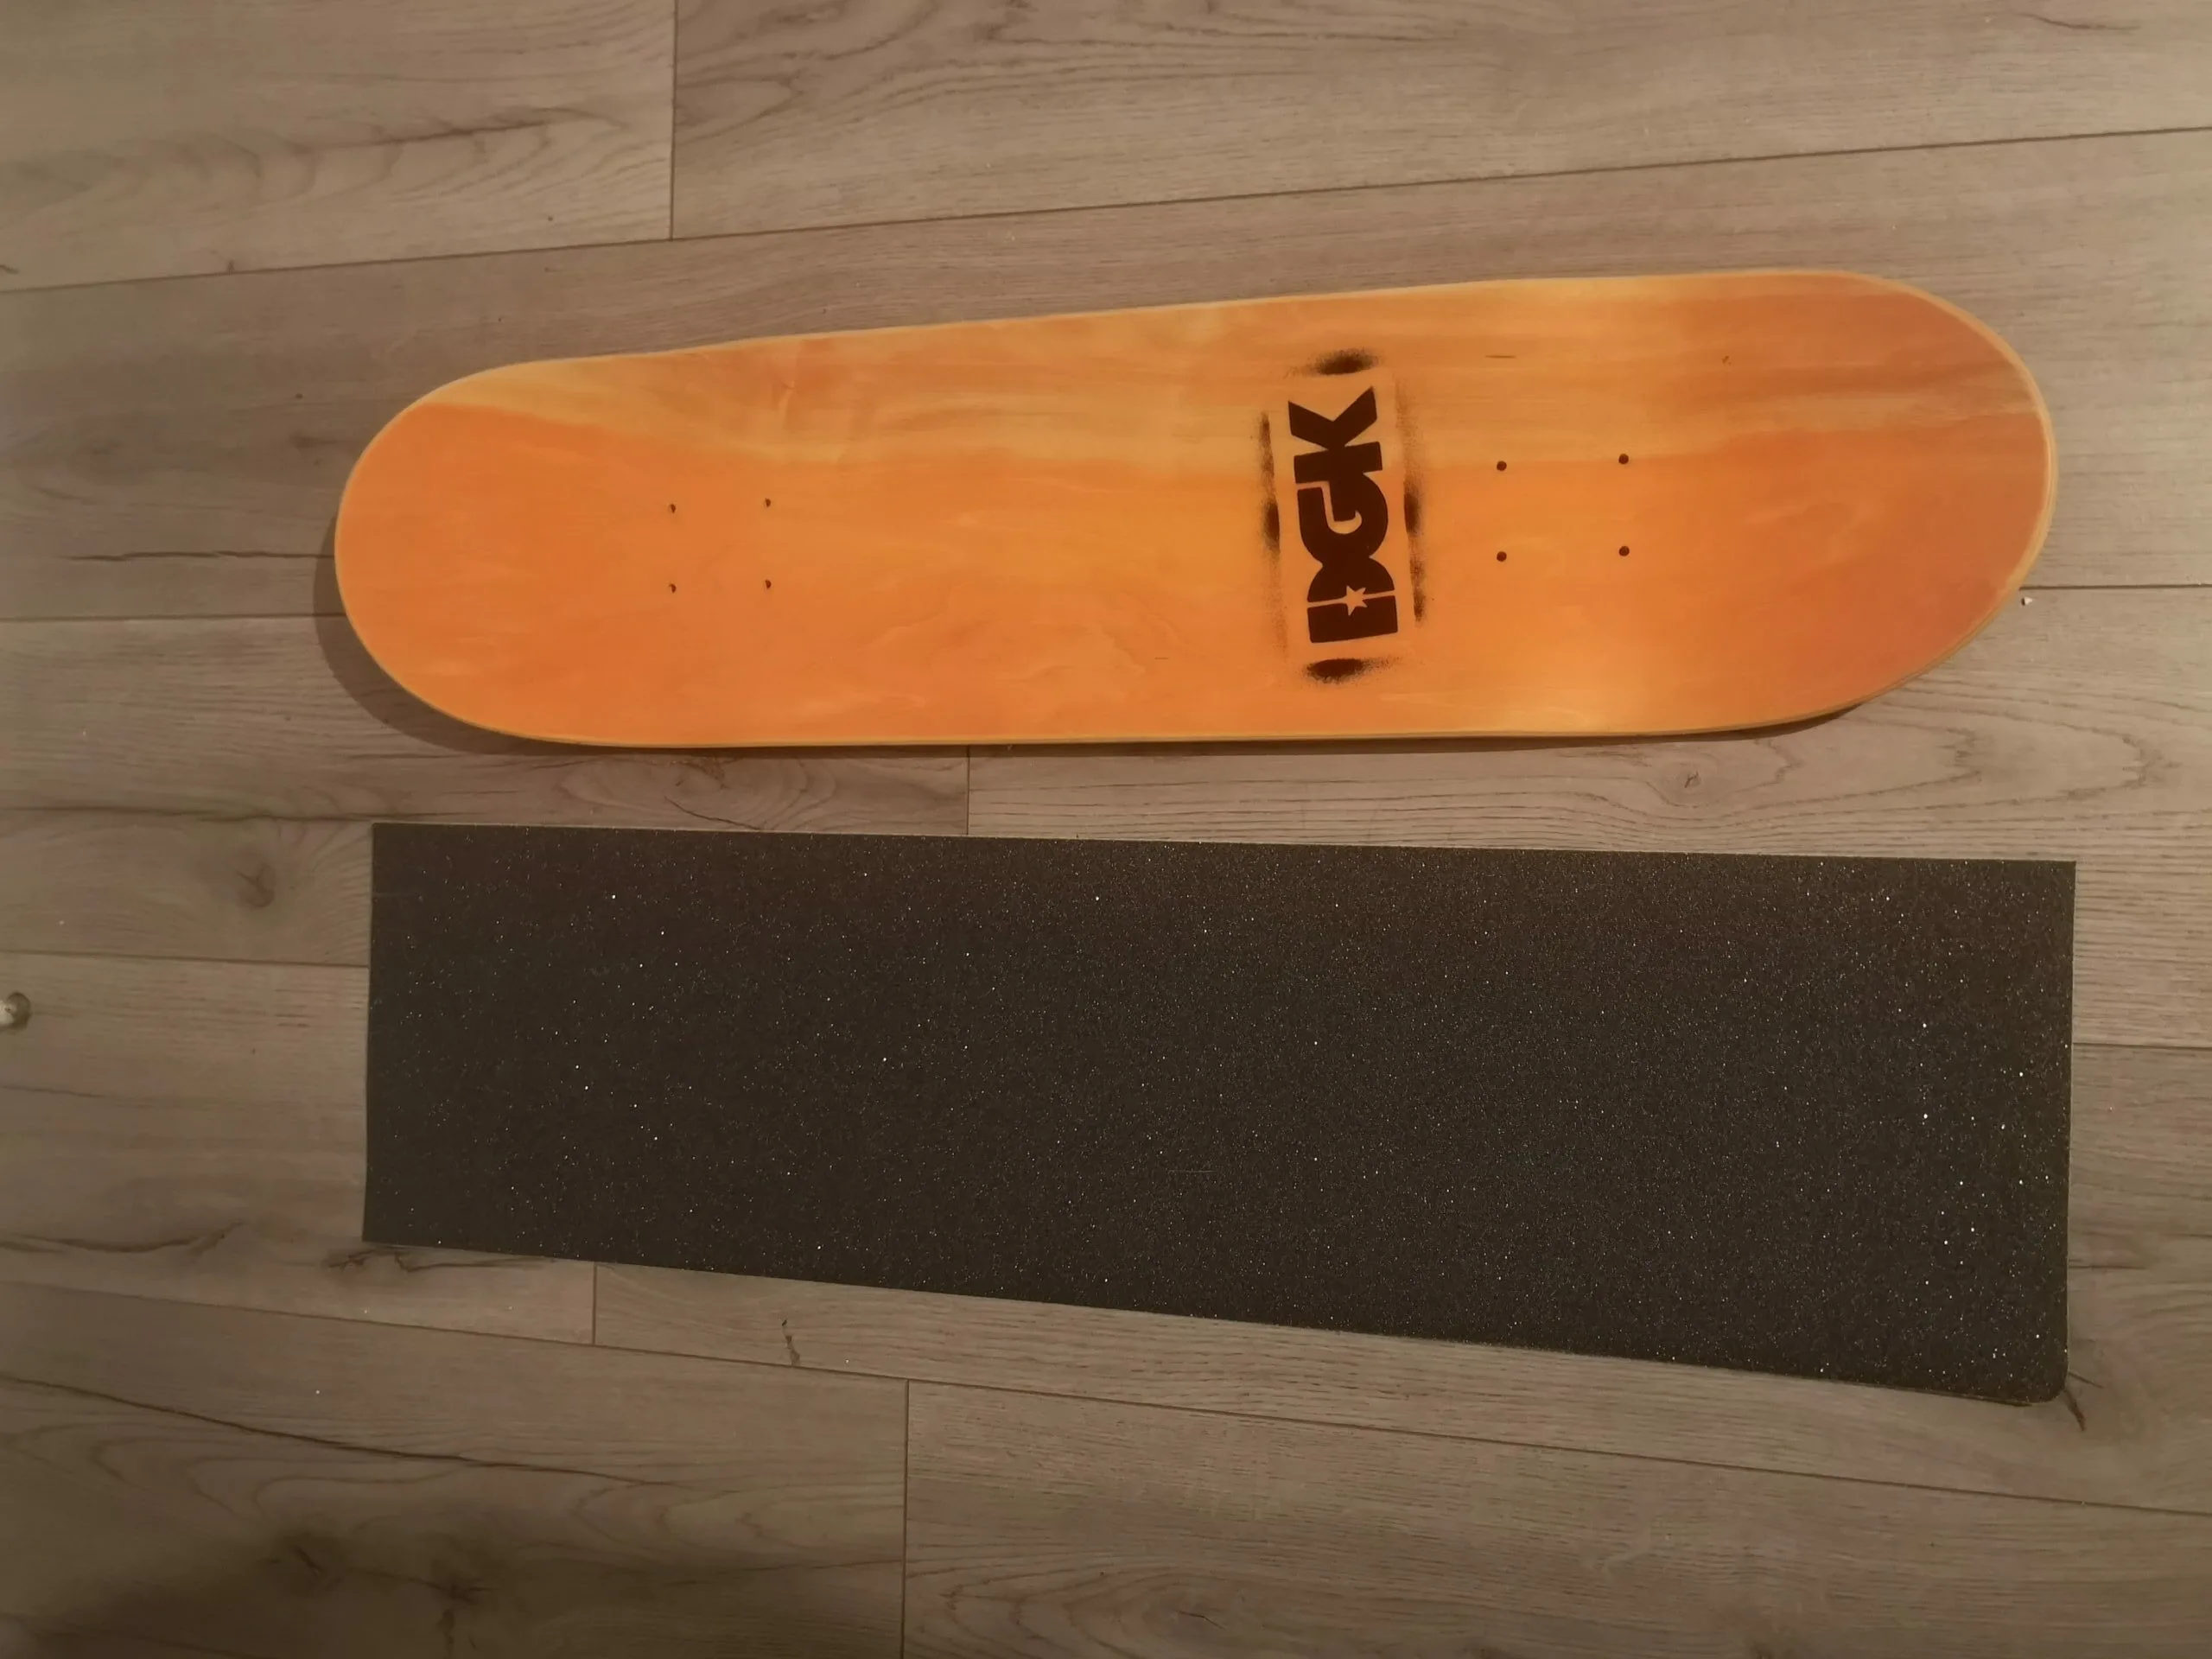
No thrills, just classic quality grip tape. We considered a more vibrant option, but when it came down to it, we couldn’t overlook the simplicity and reliability of Jessup Grip tape.
Best Alternative: Grizzly Claymation Skateboard Grip Tape – Black
If you want something a little more out there, I would personally go with Grizzly. They tend to offer more colorful designs while still maintaining quality when producing grip, unlike some other more outlandish grips out there.
Hardware: Diamond Supply Co. Felipe Gustavo 7/8″ Skateboard Bolts
Then lastly, we have this lovely set of Felipe Gustavo Pro hardware. I’m quite a fan of the Hella Tight series and have a set of Yuto Hirogome’s hardware too. However, as you will know, hardware is what it is unless you want 1″ hardware for longboards and cruisers. So we went for style here, and we think it paid off.
Best Alternative: Enjoi Colourful Little Buddies 1″ Phillips Bolts

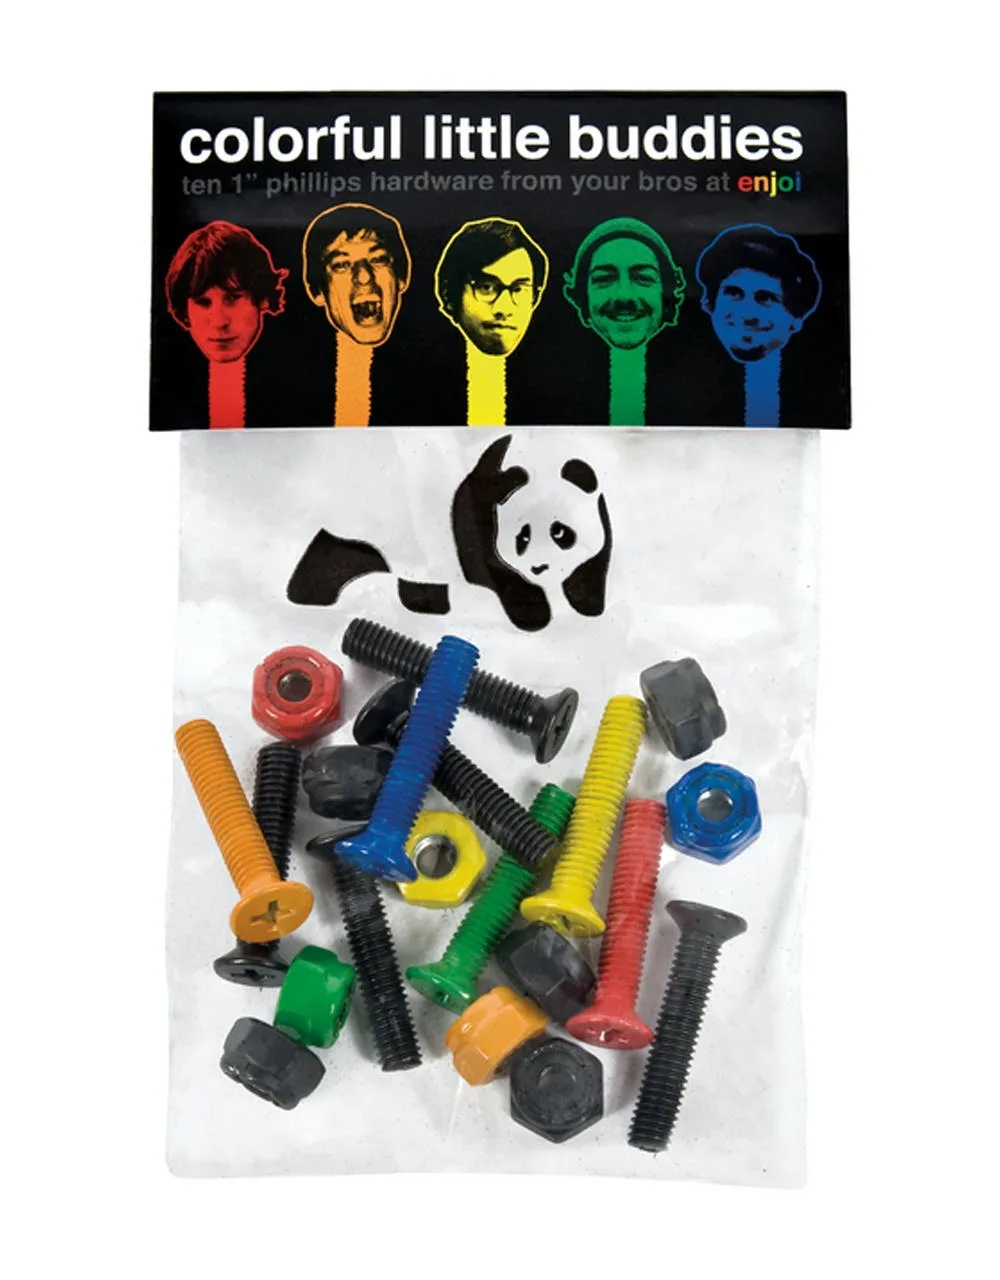
To contradict me here, I often go with these 1″ options time and time again. Mostly because they look colorful and fun. However, if you like that little bit of extra wiggle room when putting the trucks on, these are a great option.
How to Build a Custom Board – A Guide
So now that you know what we are working with, it’s time to run you through the process of building a custom DIY skateboard. We will start right from the beginning and offer a comprehensive, step-by-step guide so that you don’t miss a beat, and by the end, you can roll away on your completed build. Check it out below:
Step One: Gripping Your Board:
(I): Decide what grip style you want to go for
Before you begin, you will want to decide if you want to cover the whole board with grip or if you want to expose some of your board to give the deck a neat pattern, show off a logo, or a section of color. In my case, I had some clear Grizzly Grip Tape laying around, so I decided to stick that over the DGK logo to give the top of the board a pop of color. However, even without clear grip tape, exposing some of the deck will not affect your performance, so feel free to be creative here.
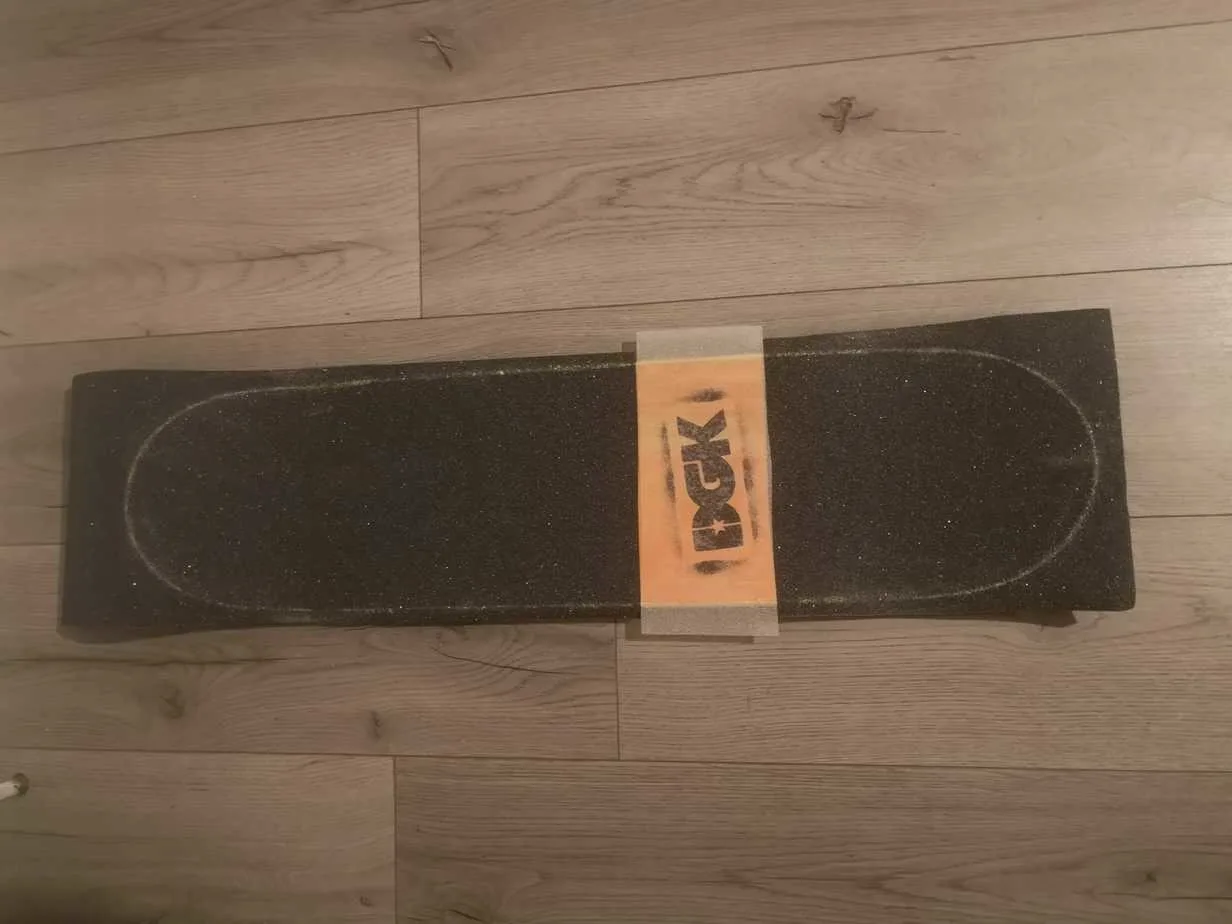
(II): Cut Grip tape into sections

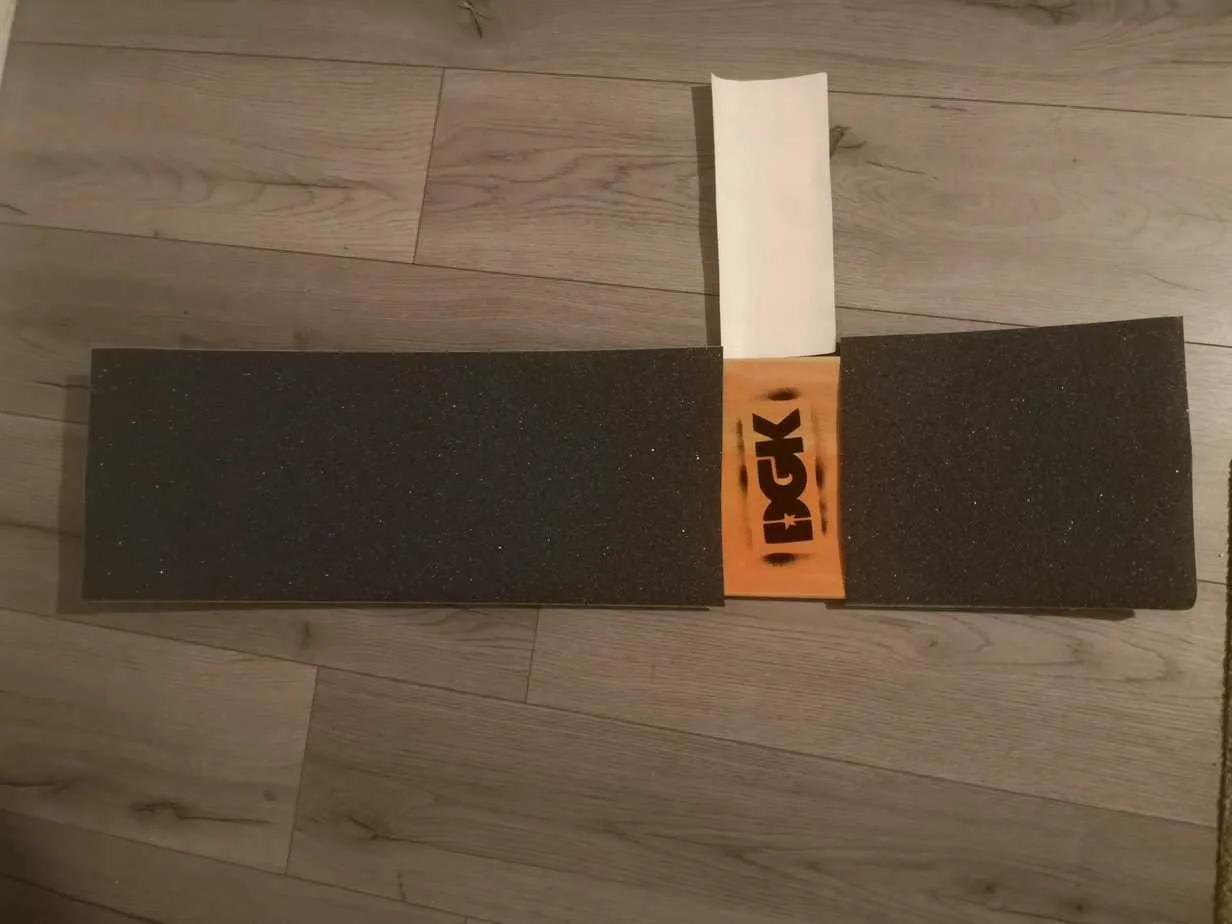
Once you have an idea of what you want to do, you should lay the grip tape alongside the deck and cut out the sections you’ll need to complete your desired look. If you have access to a guillotine, this will produce the cleanest results, but for simple designs like this one, you can easily freehand.
(III) Peel Back sheet from grip tape and press down on the deck

Next, you will want to peel each section one at a time and press the sticky side down onto the board. When pressing down, try to make sure you are sticking from one end and gradually pressing down until the other is stuck down. This will ensure that no air bubbles get stuck under the tape. Also, when this is pressed down, try to smooth this out as best you can. Most grip tape will come with a cardboard roll; this can work well for this.
(IV) Go around the outline of the deck with a flat edge

Once you have all the sections of the grip tape pressed down firmly on the board, you will want to take a flat edge and press down the edges, making a marking on the grip tape rather like a chalk outline. If you have your skate tool nearby, this will do the job nicely.
(V) Cut outline of the deck with razor/knife

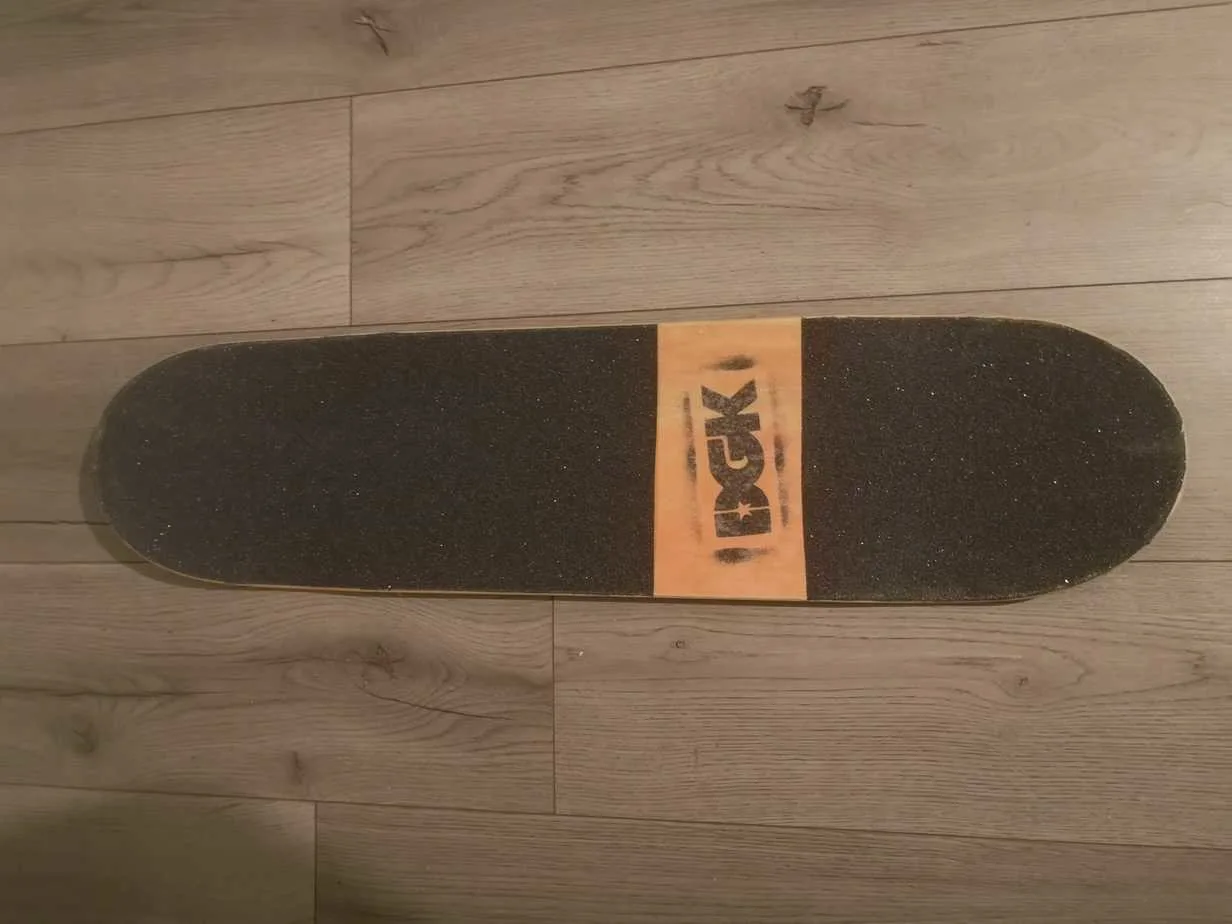
Now that the sides are pressed down, and you have a clear line to follow, take your blade and smoothly run it along the path of the board’s outline. Try to glide the blade like you would do with scissors when cutting wrapping paper; this will lead to the cleanest cuts and less cleanup to do later.
Step Two: Setting Up Your Trucks
(I) Cutting/piercing holes for your hardware
Now that you have the board nicely gripped, it’s time to break out the hardware. For this step, you will need your skate tool, your Allen key, your hardware, your trucks, and a knife, depending on how you want to create holes for your hardware.

To begin with, we need to pierce holes in the grip tape to allow the hardware to pass through and hold the trucks. A lot of skaters will take the time to use a knife and cut out perfect circular holes above the tape, which admittedly does look neater. However, the lazy option, and in my opinion, the better option, is to take Allen key or the bolts themselves and push them through these holes. Then if it looks a little dog-eared, you can always cut later.
If all goes to plan, you should have something that looks like the holes shown above.
(II) Combine trucks and hardware until finger tight

Now it’s time to add the trucks to the equation. You’ll want to turn the board upside down and place the truck holes over the matching holes on the board. You will want to place the trucks so that both of the kingpins (the big bolt in the middle of the truck) are facing each other. Once you have the trucks over the appropriate holes, add one bolt at a time and then screw a nut to each until it is finger tight. We will come back and tighten them properly later.
(III) Use Allen Key and Skate Tool to tighten Hardware

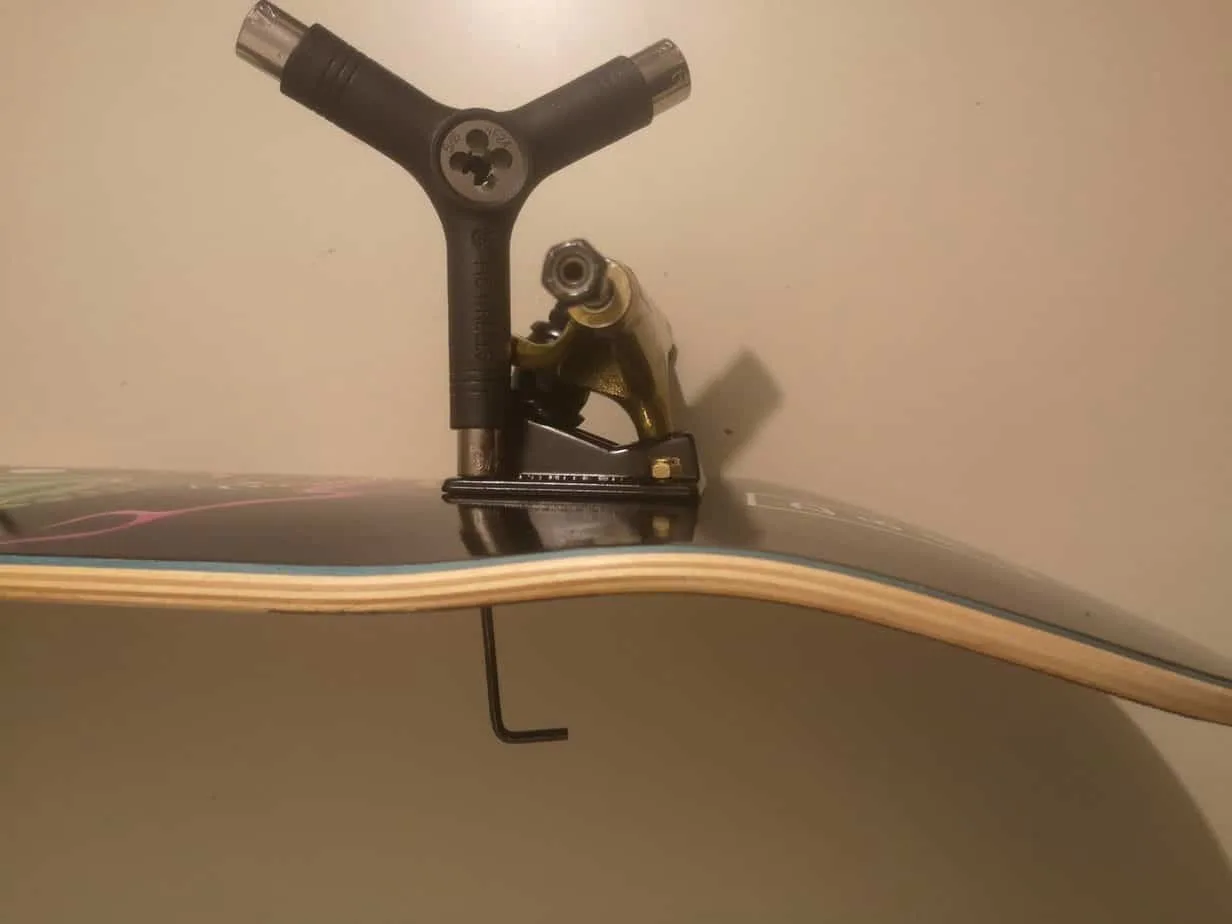
Once both trucks are secured by the finger-tight nuts, turn the board on its side and then grab your skate tool and your Allen key. You’ll want to go one bolt at a time and tighten each one nice and tight. Just be careful not to go too tight; we don’t want pressure cracks. Just tighten until the top of the bolt on the grip side is no longer protruding. You’ll need to place the Allen key in the bolt to hold it steady and then use the 3/8″ fixture of the skate tool to tighten the nut, as shown above.
Step Three: Fitting Your Bearings
(I) Fit Bearings Loosely Into Wheels

Next are the things that make your wheels go zoom, your bearings. For this process, you will need your bearings, your wheels, and you’ll need to have the trucks now attached to the board handy too.
What you need to do first is take your bearings and push one into each side of the wheel, it may seem a little tight, but with a good push, you will get them in. If not, don’t panic, as the next step will solve this. If all goes well, they should look like this.
We will also say that before this, some skaters will opt to lubricate their bearings. However, most good bearings will come pre-lubricated, so if your’s don’t, consider your choices. However, we will offer a tutorial for this in the maintenance section below.
(II) Use trucks to Tightly fit bearings

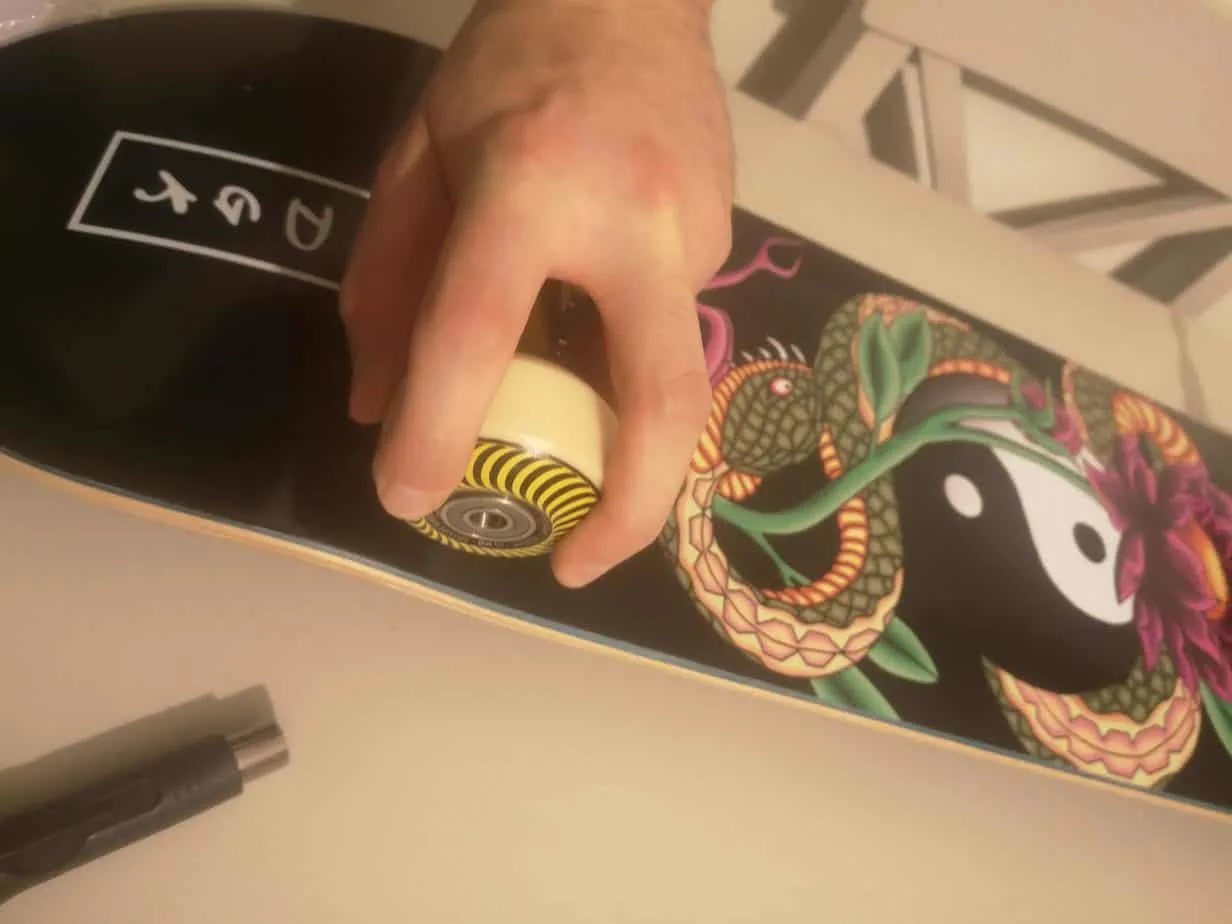
Now, you can’t ride with bearings that are barely even inside the wheel, so we need to get them pressed in there tight. There is such a thing as a bearing press, but outside of a skate shop, we doubt you will ever see one or need one. Instead, you simply untighten the wheel bolts on a truck and then place the wheel on the truck. Then apply pressure inwards until the bearing sinks into the wheel, as seen above.
If you have done everything correctly, you should notice that the bearings have sunk into their respective slots, as shown below.
Step Four: Attaching Your Wheels
(I): Remove wheel nuts and washers

Then lastly, it’s time to add the wheels so you can roll around with careless abandon. I know you probably have already removed your wheel nuts, but let’s assume you haven’t and take those off. Then also remove one of the two washers. You’ll want to leave one where it is as this will protect this side of the wheel while the other will protect the outside.
(II) Place Wheels on trucks & tighten your wheel nuts

Then finally, you will want to place your wheels on each side of the pair of trucks, add the washer to the outside of each wheel, and then you will want to add your wheel nuts back into the mix, tightening them with your 9/16″ skate tool fixture. You’ll want to tighten these so that they are as tight as possible while still allowing the wheel to spin freely without any friction. It should end up looking like something shown above.
Step Five: The Finished Article

The only thing to do now is sitting back and marvel at your excellent work and craftsmanship. I mean, just look at the beautiful creation.
Tweaks to Consider
While these things are merely considerations and preferences, we thought we would run through them too. Check it out below:
Adjusting your trucks
When it comes to tight or loose trucks, it really comes down to the preference and the style of the skater. When it comes to beginner skaters, tight trucks tend to be the norm. Whereas with tenured skaters, they tend to ride with super loose trucks. However, there are lots of skaters who break these general rules. For example, I would tend to ride new trucks quite tight and then gradually loosen them over time—different strokes for different folks and all that.
Open Bearings
This is something that is heavily endorsed by the legendary Tony Hawk himself. He suggests that skaters should ride with no shields on their bearings. This is because it allows dirt and grime to enter and leave the bearing, meaning that they are easier to clean and last longer. However, this comes from a man that mainly skates vert and park, so take this as you will.
Essentail Maintainence


Cleaning/Lubricating Bearings
While lubricating bearings and cleaning them aren’t things you normally need to do out of the box, if you are a street skater, you will ultimately need to do this if you want to be economical when it comes to bearing use. So here is how to clean and lube bearings:
- Take off the bearing by hooking the edge of the bearing in the wheel on the edge of the truck.
- Remove the bearing shields with either a knife for plastic shields or pliers for metal shields.
- Then, you need to clean the bearings. You can either do this by soaking them; you can throw them into a container with solvent and shake the life out of them. Or, if you are like me, you will use the Bones Bearing Cleaning Kit with built-in spacers so that you can do this in the most effective way possible.
- You’ll need to leave your bearings to dry now. You can let them air dry in a warm, dry spot for a few hours. Or, if the streets are calling your name, you can use a hairdryer.
- Then, you will want to lube up your bearings. You can use grease or something like WD40, for example. However, I would personally recommend a light layer of Bones Speed Cream. Unlike oil and other substances that almost work too well and leave your bearings prone to damage and destruction much faster. Plus, the oil will heat up when spinning, and this can occasionally melt your wheels, which is not ideal, to say the least. Bones Speed Cream is a safer and reliable alternative made by skaters for skaters. However, even with this product, don’t go crazy with the lube. One good drop between each ball bearing will do just fine.
- Now, you just need to pop your shield back into place, put them back in your wheel, reattach the wheel, and away you go!
Rethreading Trucks
Then lastly, we want to teach you how to rethread trucks; it’s really quite a simple process. Check it out:
- Take your stubborn axle nut off with your 9/16″ skate tool fixture, and then remove your wheel.
- Turn your board on its side and place the axle in the hole of the rethreading fixture of your skate tool.
- Turn the tool clockwise and make sure that this is perpendicular to the axle to avoid making new, lob-sided threads. Turn until there is significantly less resistance.
- After this, try it out and see if the axle nut goes on easily. If so, then put everything back together. We would also consider filing the edge if needed and also replacing old axle nuts that have been bashed to bits.
If You Want Something Done Right, Do It Yourself!

As you can see from the information above, building a skateboard with custom parts isn’t all that hard. So long as you know what each part does and where it needs to go, it’s all fairly straightforward. Lovingly piecing together your board is not only a wonderful event each time you buy new gear. It teaches a series of key skills that every skater should have in their locker, should they ever have to perform some skate maintenance on the fly. We hope that this article serves you well when you piece your next setup together and keep an eye out for future articles reviewing the various components within this setup. As always, thanks for reading, everyone!
FAQ Section
Answer: A complete skateboard is basically the antithesis to the board set up in this article. This is a pre-build board with pre-selected components that skaters can buy online or via local skate shops. The appeal of these boards is that you can literally ride them from the moment you step out of the shop. Or in them, if the place has a mini-ramp and is cool with it. However, these boards tend to be made with cheaper components and materials to justify the lower price point.
Answer: Honestly, when picking a skateboard, it’s mostly about aesthetics, concaveness, and size. When it comes to the larger companies, and most small companies for that matter, the quality of boards tends to all be very high. So unless it is a very small, independent company, you can trust that you are getting a decent board. However, if you want some brands that you can wholeheartedly trust, check out this list:
• Alien Workshop
• Blind
• Chocolate
• DGK
• Element
• Girl
• Madness
• Powell Peralta
• Santa Cruz
Answer: Focusing on a skateboard is a skater term that basically refers to a skater snapping a board in frustration. We have all been there, having tried to land a trick for a few hours, and the anger gets the better of us. We are only human. I have also heard this term being used when skaters simply snap a board through no fault of their own.
For more interesting readings check out: